Introduction to Templating
Twig (opens new window) is a fast and powerful templating system, commonly used to power front-end views in content management systems like Craft, Drupal, and WordPress (via the Timber (opens new window) plugin).
Let’s take a look at how it works.
#Types of Twig code
Twig templates are HTML files that are sprinkled with bits of Twig code. When Twig loads a template, the first thing it will do is separate the raw HTML code from the Twig code. The raw HTML code will be output to the browser without any tampering.
All Twig code follows a basic pattern that separates it from the surrounding HTML. At its outer edges you will find left and right curly braces ({ and }), coupled with another character that signifies what type of Twig code it is. These sets of characters are called “delimiters”.
There are three types of delimiters that Twig looks out for:
{#– Comments{%– Tags{{– Print statements
#Comments
Twig comments are wrapped in {# and #} delimiters. You can use them to leave little notes for yourself in the code.
They are similar to HTML comments in that they won’t show up as rendered text in the browser. The difference is that they will never make it into the HTML source in the first place.
<!-- This will be visible in the HTML source -->
{# This won’t! #}
#Tags
Twig tags are wrapped in {% and %} delimiters, and are used to define the logic of your template, such as conditionals, loops, variable definitions, template includes, and other things.
The syntax within the {% and %} delimiters varies from tag to tag, but they will always start with the same thing: the name of the tag.
In their simplest form, the tag name might be all that’s required. Take Craft’s requireLogin tag, for example:
{# A user must be logged in to visit this page #}
{% requireLogin %}
Other tags can accept parameters. In the case of Craft’s exit tag, you can optionally set the HTTP status code that should be sent to the browser in the response:
{# This is not the page you are looking for #}
{% exit 404 %}
Some tags are meant to be used in pairs, such as the js tag, which registers JavaScript code onto the page.
{% js %}
  console.log('Hello world');
{% endjs %}
Some tags can have nested tags between the opening and closing tags:
{% if currentUser %}
  <a href="/logout">Logout</a>
{% else %}
  <a href="/login">Login</a>
{% endif %}
Refer to the Tags page for a full list of tags available to your Craft templates.
#Print Statements
To output dynamic values, use a print statement. Print statements are opened and closed with {{ and }} delimiters, respectively, can contain any valid Twig expression—so long as it produces something that can be treated as a string.
<p>Hi, {{ currentUser.name }}</p>
Don’t place a print statement (or other Twig tags) within another print statement. See Combining Strings to learn how to combine strings with other expressions.
#Auto-escaping
Most of the time, print statements will automatically HTML-encode the content before actually outputting it (called auto-escaping), which helps defend against cross-site scripting (XSS) vulnerabilities.
For example, let’s say you have a search results page, where the search query is defined by a q query string parameter, and in the event that there are no results, you want to output a message to the user that includes the query:
{% set query = craft.app.request.getQueryParam('q') %}

{% set entries = craft.entries()
  .section('blog')
  .search(query)
  .all() %}

{% if entries %}
  <h3>Search Results</h3>
  <ul>
    {% for entry in entries %}
      <li>{{ entry.getLink() }}</li>
    {% endfor %}
  </ul>
{% else %}
  <p>Sorry, no results for <strong>{{ query }}</strong> were found.</p>
{% endif %}
If it weren’t for auto-escaping, a search for <script>alert('Uh-oh')</script> would result in this HTML:
<p>Sorry, no results for <strong><script>alert('Uh-oh')</script></strong>.</p>
Which would cause JavaScript to execute on the page, even though it wasn’t part of the original Twig template. But thanks to auto-escaping, you’d actually end up with this HTML:
<p>Sorry, no results for <strong><script>alert('Uh-oh')</script></strong>.</p>
There are two cases where print statements will output content directly, without auto-escaping it first:
- When the content is deemed safe by the last tag or function that was called within the print statement (such as the markdown filter).
- When you explicitly mark the content as safe using a raw (opens new window) filter.
#Manual escaping
There are times where you may need to work with both trusted and untrusted content together. For example, let’s say you want to output user-supplied content as Markdown, but you want to ensure they haven’t put anything nefarious in there first.
To do that, you could explicitly encode all HTML within the user-supplied content using the escape (opens new window) filter, before passing it to the markdown filter:
{# Escape any HTML in the Body field, then format as Markdown #}
{{ entry.body|escape|markdown }}
Alternatively if you want to allow some HTML, so long as it’s tame, you can use the purify filter, which sanatizes the content using HTML Purifier (opens new window).
{# Purify the content in the Body field, then format as Markdown #}
{{ entry.body|purify|markdown }}
#Variables
Twig supports setting custom variables in your templates, which let you save a value to be referenced later on in your template.
You can define variables using the set (opens new window) tag.
{% set title = "About Us" %}
{% set docTitle = title ~ " | ACME, Inc." %}

<html>
  <head>
    <title>{{ docTitle }}</title>
  </head>
  <body>
    <h1>{{ title }}</h1>
    <!-- ... -->
  </body>
</html>
Craft provides a few predefined variables that will be available in addition to the variables you define yourself. Refer to the Global Variables page for a full list of global variables available to your Craft templates.
#Functions
There are several functions available to your Twig templates, which can do a wide variety of things. For example, Craft provides a hiddenInput function that can be used to generate the HTML for a hidden input:
{{ hiddenInput('entryId', 100) }}
{# Output: <input type="hidden" name="entryId" value="100"> #}
Refer to the Functions page for a full list of functions available to your Craft templates.
#Filters
Filters are like functions, but they use a pipe syntax (|), and they are always meant to manipulate a value of some sort. For example, Craft provides an markdown filter, which converts Markdown (opens new window)-formatted text into HTML:
{% set text = "I **really** love Tom Petty." %}
{{ text|markdown }}
{# Output: <p>I <strong>really</strong> love Tom Petty.</p> #}
You can chain filters together. Each subsequent filters will use the result of the previous filter as its starting point.
{% set text = "I **really** love Tom Petty." %}
{{ text|markdown|striptags|upper }}
{# Output: I REALLY LOVE TOM PETTY. #}
Note that filters will only apply to the value that immediately precedes it. If you want to apply the filter to the result of an expression, you must wrap the expression in parentheses first.
{{ 100.3 + 50.3|round }}
{# Output: 150.3 #}

{{ (100.3 + 50.3)|round }}
{# Output: 151 #}
Refer to the Filters page for a full list of filters available to your Craft templates.
#Tests
Tests are like functions that only return true or false, and are meant to reveal something about the nature of a value. For example, the defined (opens new window) test will return true or false depending on whether a variable or hash/object property is defined:
{% if specs.weight is defined %}
  <dt>Weight</dt>
  <dd>{{ specs.weight }}</dd>
{% endif %}
If you are looking for whether a test returns false, use the is not syntax:
{% if entry is not defined %}
  {% exit 404 %}
{% endif %}
Refer to the Tests page for a full list of filters available to your Craft templates.
#Types of values
There are six types of literal (opens new window) values that have specific syntaxes or features in Twig, as well as the special null type.
Let’s take a look at each of them in detail.
Craft exposes many other types of data to templates that don’t fit squarely into these groups—if you encounter an error and aren’t sure how to work with a value, try passing it to the dump() function to print some debugging information about it:
{{ now }} {# -> Error! #}
{{ dump(now) }} {# ->  object(DateTime) ...  #}
In this case, the now variable was a DateTime object (opens new window). Each object or “class” will have different properties and methods you can use—but it may take some independent research to figure out what they are:
{{ now.format('Y') }} {# -> 2022 #}
#Strings
Textual values are called strings. To identify a string, wrap some text in either double or single quotation marks (but not curly/smart quotes).
{% set greeting = "Hello there" %}
Once you’ve started a string, Twig will keep parsing it until it comes across another matching quotation mark. Which means that you can safely add other quotation marks inside the string—as long as it’s not the same type of quotation mark.
{% set heading = 'Try the new 7" folding tablet' %}
{% set subheading = "The original Microsoft Surface was 3.5' long." %}
If you need to use both types of quotation marks in the same string, you can place a backslash (\) right before the one that matches the string’s opening delimiter to “escape” it from being parsed as the closing delimiter.
{% set subheading = "The original Microsoft Surface was 3' 6\" long." %}
#Combining strings
Twig provides two ways to combine strings together: You can concatenate them using the tilde (~) operator, or you can inject a string into the middle of another string using interpolation.
{# Concatenation #}
{% set greeting = "Hello, " ~ currentUser.friendlyName %}

{# Interpolation #}
{% set greeting = "Hello, #{currentUser.friendlyName}" %}
Interpolation only works in double-quoted strings. Any valid Twig expression can be interpolated!
#Numbers
Numbers can be written verbatim without any special delimiters.
{% set answer = 42 %}
Numbers can be output in a print statement, or combined with a string.
<p>The answer is {{ answer }}</p>
#Booleans
Boolean values are either true or false. Those are reserved words in Twig, so if you want to create a boolean value, you just type it out.
{% set havingABud = true %}
Booleans are most often used within conditionals, which switch a part of the template on or off depending on an expression.
If you were to output a boolean value in a print statement, or combine it with another string, the value will be converted to either '1' or '0'.
#Arrays
Arrays are ordered lists of nested values. They are delimited with left and right square brackets ([ and ]), and their values are separated by commas.
{% set todoList = [
  'Finish design',
  'Build HTML & CSS',
  'Manage content with Craft'
] %}
You can loop over an array using a for (opens new window) tag:
<ol class="todo">
  {% for item in todoList %}
    <li>{{ item }}</li>
  {% endfor %}
</ol>
Note that you can’t output an array directly in a print statement, or combine it with another string. If you want to quickly output a comma-separated list of an array’s values, you could use the join (opens new window) filter:
{{ todoList|join(', ') }}
#Hashes
Hashes are similar to arrays, except that the values are indexed by custom keys.
To define a hash, use left and right curly braces as the delimiters ({ and }). Separate your hash’s key-value pairs with commas, like arrays, and separate the individual keys from the values with a colon.
{% set specs = {
  length: '108cm',
  width: '68.6cm',
  height: '53.3cm',
  weight: '90kg'
} %}
If you need to create a hash with a dynamic key, wrap the key in parentheses:
{% set myKey = 'weight' %}
{% set myValue = '90kg' %}

{% set specs = {
  (myKey): myValue
} %}
Like arrays, you can loop over all the values in a hash using a for (opens new window) tag:
<dl class="specs">
  {% for key, value in specs %}
    <dt>{{ key }}</dt>
    <dd>{{ value }}</dd>
  {% endfor %}
</dl>
You can also access hash values directly by their keys, using either dot or array syntax:
<dl class="specs">
  <dt>Dimensions</dt>
  <dd>{{ specs.length }} × {{ specs.width }} × {{ specs.height }}</dd>

  <dt>Weight</dt>
  <dd>{{ specs['weight'] }}</dd>
</dl>
#Arrow functions
Some functions and filters let you pass an arrow function as an argument. Arrow functions are compact, single-statement functions that you define in-line.
For example, Craft’s group filter accepts an arrow function, which is executed once for each item in an array to determine the key it will be grouped by.
{% set groceryList = [
  {name: 'Eggs', category: 'Dairy'},
  {name: 'Pancake Mix', category: 'Breakfast'},
  {name: 'Milk', category: 'Dairy'},
  {name: 'Onions', category: 'Produce'}
] %}

{# output the list by category #}
{% set itemsByCategory = groceryList|group(item => item.category) %}
{% for category, items in itemsByCategory %}
  <h3>{{ category }}</h3>
  <ul>
    {% for item in items %}
      <li>{{ item.name }}</li>
    {% endfor %}
  </ul>
{% endfor %}
#Operators
You have a wide variety of operators at your disposal for simple and complex arithmetic, string manipulation, and logical comparisons
#Loops
You’ll frequently need to loop over multiple items in an array or hash. To do that, you’ll use a for (opens new window) tag.
{% set todoList = [
  'Finish design',
  'Build HTML & CSS',
  'Manage content with Craft'
] %}

<ol class="todo">
  {% for item in todoList %}
    <li>{{ item }}</li>
  {% endfor %}
</ol>
Hashes give you access to both the key and value, within the loop:
{% set colors = {
  red: '#F00',
  green: '#0F0',
  blue: '#00F',
} %}

{% for name, hex in colors %}
  <span style="color: {{ hex }}">{{ name|title }}</span>
{% endfor %}
The same syntax works for arrays, but exposes the numeric index. In both cases, you get access to a loop variable (opens new window), with a number of useful properties.
#Conditionals
Your templates can contain conditionals, which are initiated by an if (opens new window) tag, which contains an expression that will be evaluated as either true or false, and will show part of a template depending on the result of that expression.
{% if currentUser %}
  <p>Hello, {{ currentUser.friendlyName }}</p>
{% endif %}
You can include an {% else %} tag to show a different part of your template when the condition is false:
{% if currentUser %}
  <a href="/logout">Logout</a>
{% else %}
  <a href="/login">Login</a>
{% endif %}
You can also include intervening {% elseif %} tags (before the {% else %} tag, if there is one), to create additional fallback conditions in the event that the original condition is false:
{% set hour = now|date('G') %}

{% if hour < 12 %}
  <p>Good morning, {{ currentUser.friendlyName }}</p>
{% elseif hour < 17 %}
  <p>Good afternoon, {{ currentUser.friendlyName }}</p>
{% else %}
  <p>Good evening, {{ currentUser.friendlyName }}</p>
{% endif %}
If you want to switch between different parts of your template depending on the value of something, Craft’s switch tags provide a simpler syntax than multiple {% if %} and {% elseif %} tags each comparing the same value over and over again.
#Existence and Truthiness
A common pattern for conditional rendering is testing whether a value is empty or exists at all. Some values may behave differently than you might expect!
#Dealing with Undefined Values
Twig has a few features that help you write more resilient templates. When you suspect a value may not exist (say, in an include), use the defined (opens new window) test:
{% if style is defined %}
  {% set classNames = "tip tip--#{style}" %}
{% else %}
  {% set classNames = "tip tip--plain" %}
{% endif %}
This ensures that the style variable exists before we try and use it. Accessing an undefined variable or property when Craft’s Twig environment has strict_variables (opens new window) enabled (set when devMode is on) will result in an error. When devMode is off, Twig will suppress those errors and treat undefined values as null.
Given this template…
{% set duration = 500 %}
{% set config = {
  delay: 100,
} %}
…you can expect these results:
| Expression | Result |
|---|---|
duration | Value (Integer) |
animation | Error |
duration is defined | true |
animation is defined | false |
config | Value (Object) |
config is defined | true |
config.delay | Value (Integer) |
config.timingFunction | Error |
config.delay is defined | true |
config.timingFunction is defined | false |
When devMode is on, any row indicating “Error” will instead produce a null value.
#Emptiness
What about values that we’re confident are defined, but may not contain usable data? Let’s look at some features that give us better information about the contents of a variable.
With the exception of '0' (a string containing only a zero), the “emptiness” of values in Twig is fairly straightforward:
| Value | is empty | Truthy? |
|---|---|---|
null | ||
true | ||
false | ||
1 | ||
0 | ||
'' | ||
'A' | ||
[] | ||
{} | ||
'1' | ||
'0' |
All of the values above are still considered defined—whether they’re used verbatim or assigned to a variable. Note the distinctions between what is considered “empty” and “truthy,” though!
To help streamline these checks, the default filter and null coalesce operator (opens new window) protect against undefined and empty (or specifically null) values. Our example from earlier could be simplified with either of these:
{% set classNames = "tip tip--#{style|default('plain')}" %}
{% set classNames = "tip tip--#{style ?? 'plain'}" %}
The first example will use 'plain' when style is undefined or empty (according to the table above), but the second will only use 'plain' when style is undefined or exactly null—so the null coalesce operator may produce undesirable output when provided an empty string.
Keep in mind that the order Twig templates are rendered in can affect when and where variables are available. The content of a layout, for example, is only processed after the template that extends it, so variables defined in the layout are not available in the template.
#Complex Objects
This section treads into some heavier programming concepts, and makes reference to a number of PHP classes belonging to Craft and Yii.
These objects are authoritatively documented in the class reference (opens new window). You will find references to methods and properties of common objects here in the main documentation, but to make the best use of them, some independent research may be required.
So far, we’ve mostly looked at plain values—but Craft exposes a number of objects to your templates, like elements (an craft\elements\Entry (opens new window) or craft\elements\Asset (opens new window) for instance) or services (accessible via craft.app).
When in doubt about the type of value you’re dealing with (or you encounter a Twig error when attempting to use them), use the {% dump %} tag to output them to the debug toolbar.
Using an undefined variable in the dump tag will still trigger an error. If this happens, dump the entire context by passing nothing to the tag.
#Negation
The not operator takes the boolean equivalent of any value and flips it. It can also invert the result of a test, or combined with defined:
{# If we know the variable exists: #}
{% if var is not empty %}
  {# There’s a value! #}
{% endif %}

{# If we aren’t sure (and the above might blow up): #}
{% if var is defined and var is not empty %}
  {# The value is definitely useful! #}
{% endif %}
#Identity
Instead of a strict-equality operator (=== in PHP and other languages), Twig has a same as(...) test for comparing values and objects. Plain values with the same type (like numbers and strings) will work as expected, but objects (like elements) may not.
In an entry’s template, for example, comparing the automatically-injected entry with results from a second query is unreliable:
{% set category = entry.topic.one() %}
{% set relatedPosts = craft.entries
  .section('blog')
  .relatedTo(category)
  .all() %}

{% for post in relatedPosts %}
  {% if post is not same as(entry) %}
    {# Whoops! Our original post is still output in the related items! #}
  {% endif %}
{% endfor %}
This is a result of the relatedPosts query loading and populating a second copy of the original entry element. Strict comparison considers these different objects, despite them containing data that refers to the same post.
Instead of comparing entire objects, consider using unique, identifying properties thereof:
{% if entry.id == relatedEntry.id %}
  {# Same entry! #}
{% endif %}
In this case, it might make more sense to exclude the original entry using element query params.
#Elements and Queries
Element queries will always evaluate as “truthy” before they’re executed. In order to reliably test against the results, you must call a query execution method that agrees with your anticipated usage:
- If you only care about whether one or more elements match the query, use
.exists(); - If you only care about the number of elements that would match the query, use
.count(); - If you will use the result(s) later, use
.one()or.all();
The last option here can be combined with the is empty test or length filter to produce the same logical result as the first two.
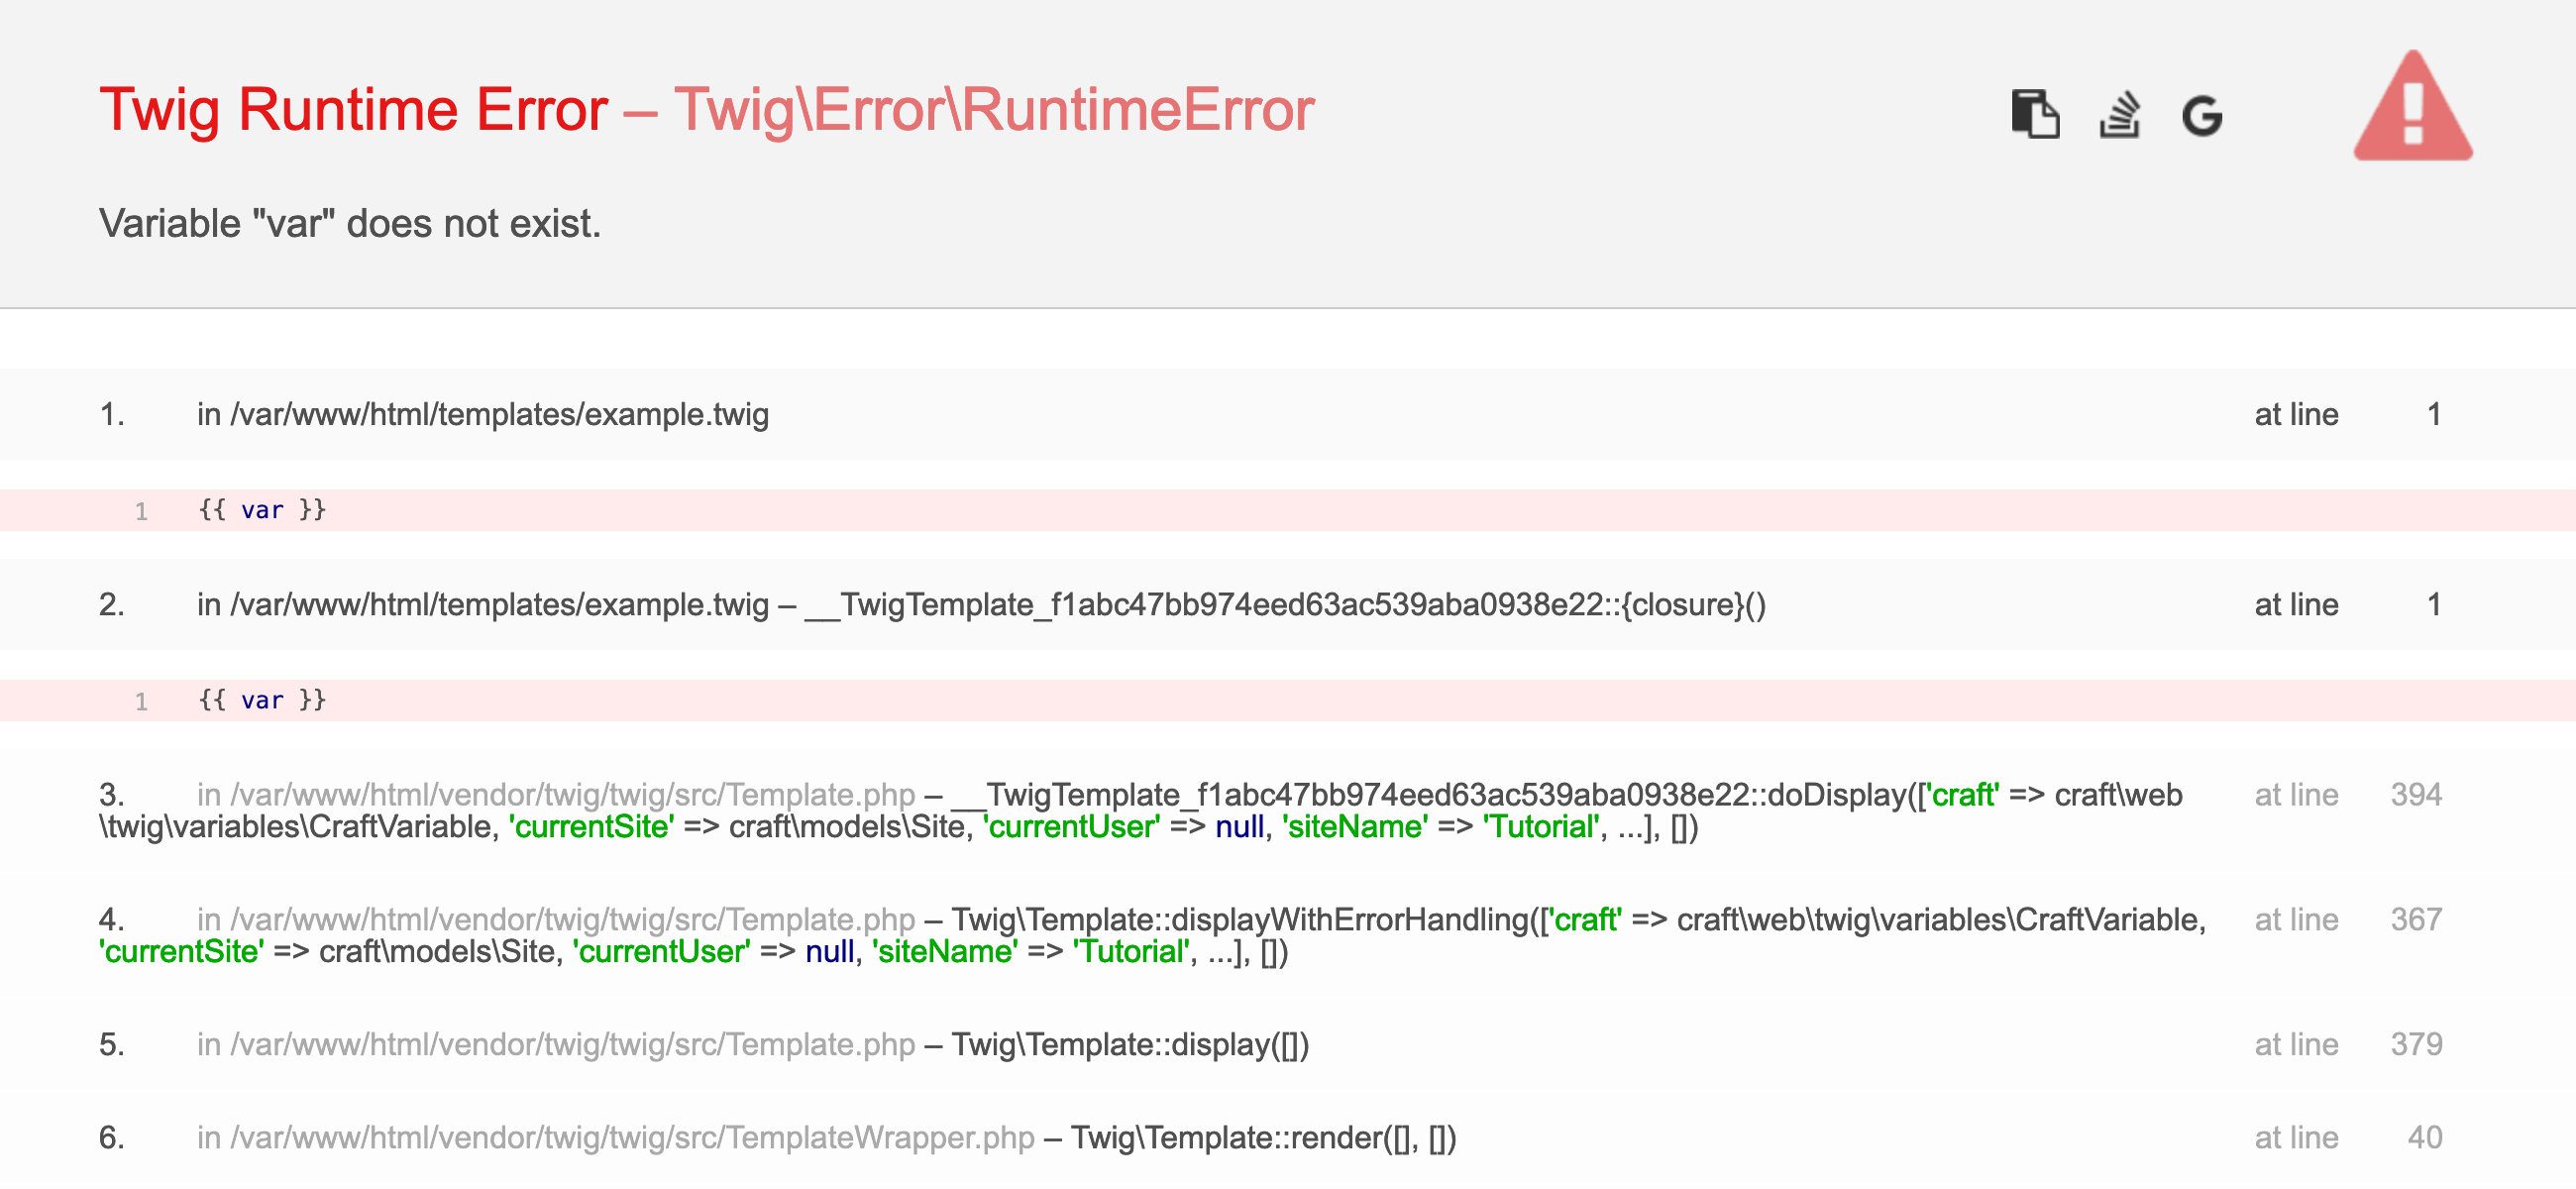
#Handling Errors
Errors can come from a number of places throughout the system, but the most common ones will be:
- Syntax Error (
Twig\Error\SyntaxError): Something went wrong when compiling a template. You may have mismatched brackets, an invalid function or filter, or a variety of other problems with the template itself that prevent it from working as expected. The error will point to the line in your template where Twig believes the error originates. - Runtime Error (
Twig\Error\RuntimeError): Oftentimes indicative of a missing variable or property, or another issue as the compiled template is being executed. - Loader Error (craft\web\twig\TemplateLoaderException (opens new window) or
Twig\Error\LoaderError): A reference to template (say, when using theincludetag) could not be resolved.
You may see other errors throughout development—but they are typically the result of a lower-level issue like improper use of methods, database connectivity, or templates getting out of sync with project config.
With devMode on, Craft will output a stack trace for any errors it encounters when rendering a template.
You can always enable Show full exception views when Dev Mode is disabled in your user’s preference screen to force the full exceptions to be shown. This does not change the behavior of the Twig environment, though, so you will not see errors for missing or undefined variables and properties.
The first error in a template will throw an exception and halt rendering, so you must fix that issue before getting information about any subsequent errors.
#DRY Templating
Whenever you’re coding anything, it’s always a good practice to keep your code “DRY” (Don’t Repeat Yourself), to avoid writing and maintaining the same general logic or HTML in multiple places. This applies to Twig as well: each page on your website is likely to have the same header and footer, and the vast majority of your pages should be made up of shared, reusable components.
Twig provides four ways to keep your templates DRY:
#Template inheritance
Twig templates can extend other templates, filling in more details than their parent. This concept is called template inheritance because sub-templates inherit a base set of HTML from their parent.
For example, you can create an _html5.twig template in your templates/ folder, which defines the base HTML boilerplate that all pages on your website should have:
<!DOCTYPE html>
<html xmlns="http://www.w3.org/1999/xhtml" lang="{{ currentSite.language }}">
<head>
  {% block head %}
    <meta http-equiv="X-UA-Compatible" content="IE=edge">
    <meta charset="utf-8">
    <title>{{ docTitle ?? siteName }}</title>
    <meta name="viewport" content="width=device-width, initial-scale=1.0, maximum-scale=1.0, user-scalable=no">
  {% endblock %}
</head>
<body {{ attr(bodyAttributes ?? {}) }}>
  {% block body %}
  {% endblock %}
</body>
</html>
This template is pretty worthless on its own, but it provides a framework for nested templates to take advantage of:
- It defines
headandbodyblocks, which give nested templates a way to override the contents of the<head>and<body>elements. - It allows nested templates to define a
docTitlevariable, which will become the<title>value, and defaults to the site name if that’s not defined. - It gives nested templates the ability to set custom attributes on the
<body>element, by defining abodyAttributeshash. (We’re using the attr function to convert that hash into a list of HTML attributes.)
With that template in place, you can now create a hello-world.twig template in your templates/ folder, which extends your _html5.twig template:
{% extends "_html5.twig" %}

{% set docTitle = 'Hello World' %}

{% set bodyAttributes = {
  class: 'hello-world'
} %}

{% block head %}
  {{ parent() }}
  <link rel="stylesheet" type="text/css" href="/styles.css">
{% endblock %}

{% block body %}
  <h1>Hello world!</h1>
{% endblock %}
This template is doing a few things:
- It’s declaring that it is meant to extend our
_html5.twigtemplate. - It’s setting
docTitleandbodyAttributesvariables, which will be passed up to the parent template. - It’s overriding the parent template’s
headandbodyblocks. - It’s pulling the parent template’s
headblock contents into the overridden block, via that{{ parent() }}print statement.
Note that when a template extends another template, it must define all of its HTML within blocks.
A layout can extend another layout, too! Suppose your site has two distinct areas, and they have markedly different navigation needs: content pages could directly extend html5.twig, while all the account/portal pages could extend an intermediate dashboard.twig that shows a toolbar with secondary navigation items.
Craft’s control panel uses this exact strategy to provide a consistent experience throughout deeply-nested content and configuration pages.
#Includes
You can create “partial” templates, which only output the HTML for an individual component, and then include them within other templates using an include (opens new window) tag.
For example, create a template called _tip.twig in your templates/ folder, with this:
<div class="tip">
  <h6>Tip</h6>
  <p>{{ tipText }}</p>
</div>
Now you can include that from another template, passing in the tipText value:
{% include '_tip.twig' with {
  tipText: 'I’m a helpful tip!'
} %}
#Embeds
Embeds are similar to includes, with a superpower: they can override template blocks within the included template. Going with our tip example, let’s say you want to make the content more customizable. you could do that by wrapping the <p> tag in a block:
<div class="tip">
  <h6>Tip</h6>
  {% block content %}
    <p>{{ tipText }}</p>
  {% endblock %}
</div>
The template will continue to work with include (opens new window) tags like before, but now other templates have the option of using an embed (opens new window) tag instead, and overwriting the entire content block:
{% embed '_tip.twig' %}
  {% block content %}
    <p>I’m a helpful tip!</p>
  {% endblock %}
{% endembed %}
#Macros
Your templates can define macros, which are reusable functions that output HTML. These are especially useful when a template needs to output similar HTML multiple times, but it’s not worth using an include because no other templates are going to need it.
For example, let’s say you find yourself repeating the same HTML and Twig code for each the global nav items in your site layout template:
<nav class="global-nav">
  <ul>
    <li class="nav-item"><a href="{{ url('about') }}">About</a></li>
    <li class="nav-item"><a href="{{ url('blog') }}">Blog</a></li>
    <li class="nav-item"><a href="{{ url('contact') }}">Contact</a></li>
  </ul>
</nav>
You could pull that <li> HTML into a macro (opens new window) tag, and then call it for each of your nav items instead:
{% macro navItem(label, path) %}
  <li class="nav-item"><a href="{{ url(path) }}">{{ label }}</a></li>
{% endmacro %}

<nav class="global-nav">
  <ul>
    {{ _self.navItem('About', 'about') }}
    {{ _self.navItem('Blog', 'blog') }}
    {{ _self.navItem('Contact', 'contact') }}
  </ul>
</nav>
You can import macros from other templates using an import (opens new window) tag.
#Additional resources
To learn more about Twig, check out these resources:
- Twig for Template Designers (opens new window) – Twig’s official templating documentation
- Twig Templates in Craft (opens new window) – CraftQuest’s 12-part video course introducing Twig templating in Craft