Matrix Fields
Matrix fields allow you to create multiple blocks of content within a single field.
# Settings
Matrix fields have the following settings:
- Configuration – This is where you configure which block types should be available to your Matrix field, and which sub-fields each of those block types should have.
- Min Blocks – The minimum number of blocks that can be created within the field. (Default is no limit.)
- Max Blocks – The maximum number of blocks that can be created within the field. (Default is no limit.)
# The Field
On a fresh entry, Matrix fields will just show a group of buttons – one for each of the Block Types you created in the field’s settings:

When you click on one of those buttons, a new block will be created. The Block Type’s name will be shown in the block’s title bar, and each of the Block Type’s fields will be present within the body of the block:
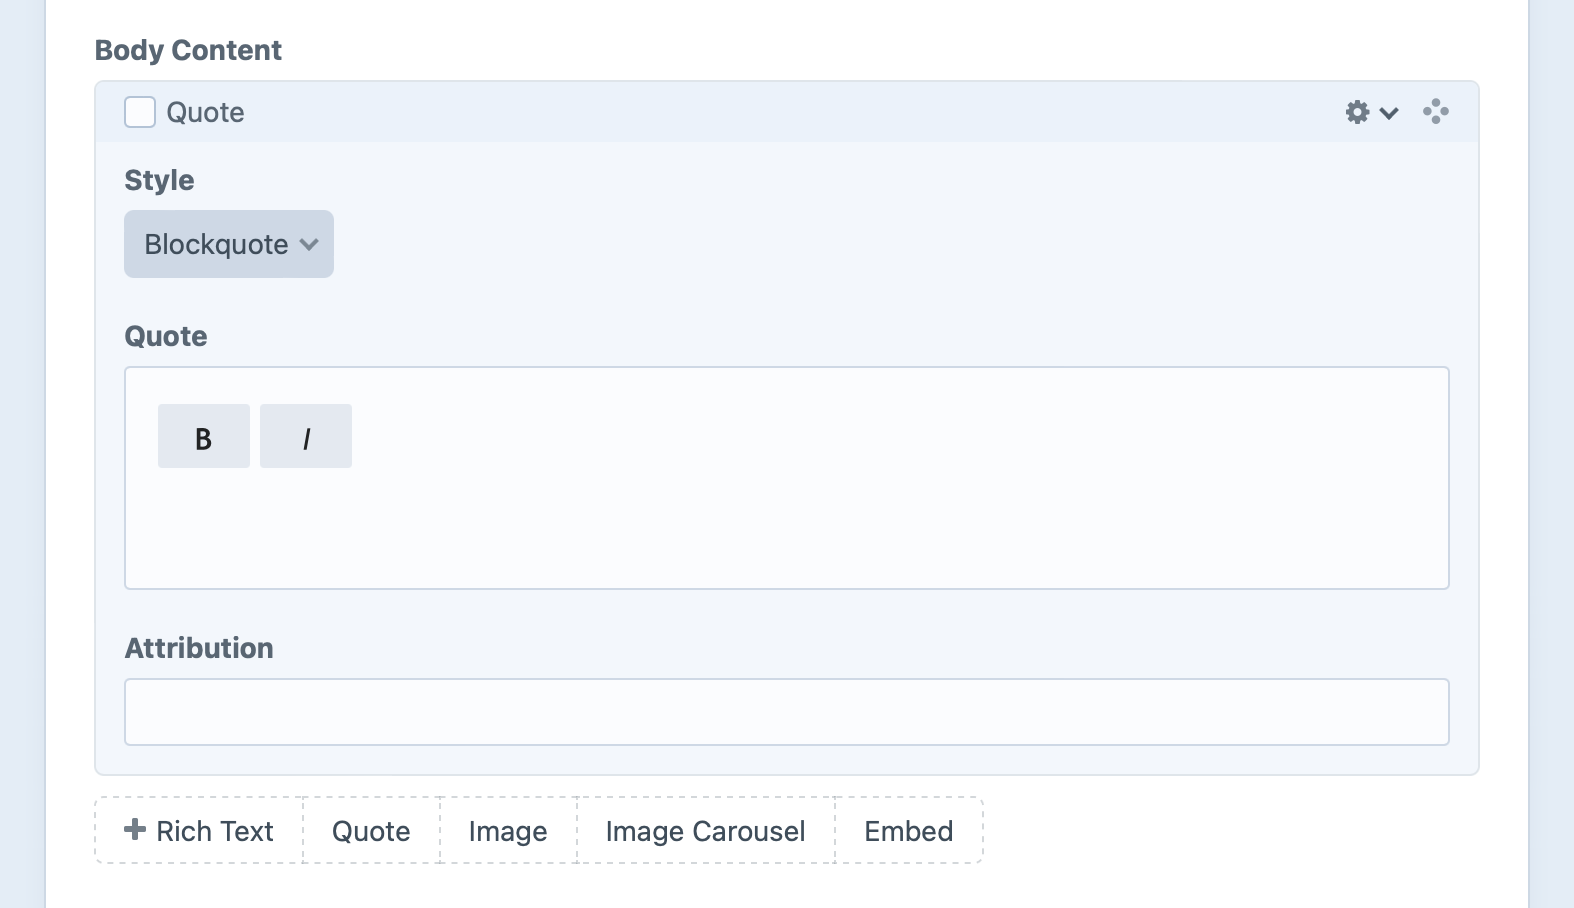
You can add as many blocks to your Matrix field as you’d like—or at least as many as the field’s Min Blocks and Max Blocks settings allow.
Each block has a settings menu that reveals additional things you can do with the block:
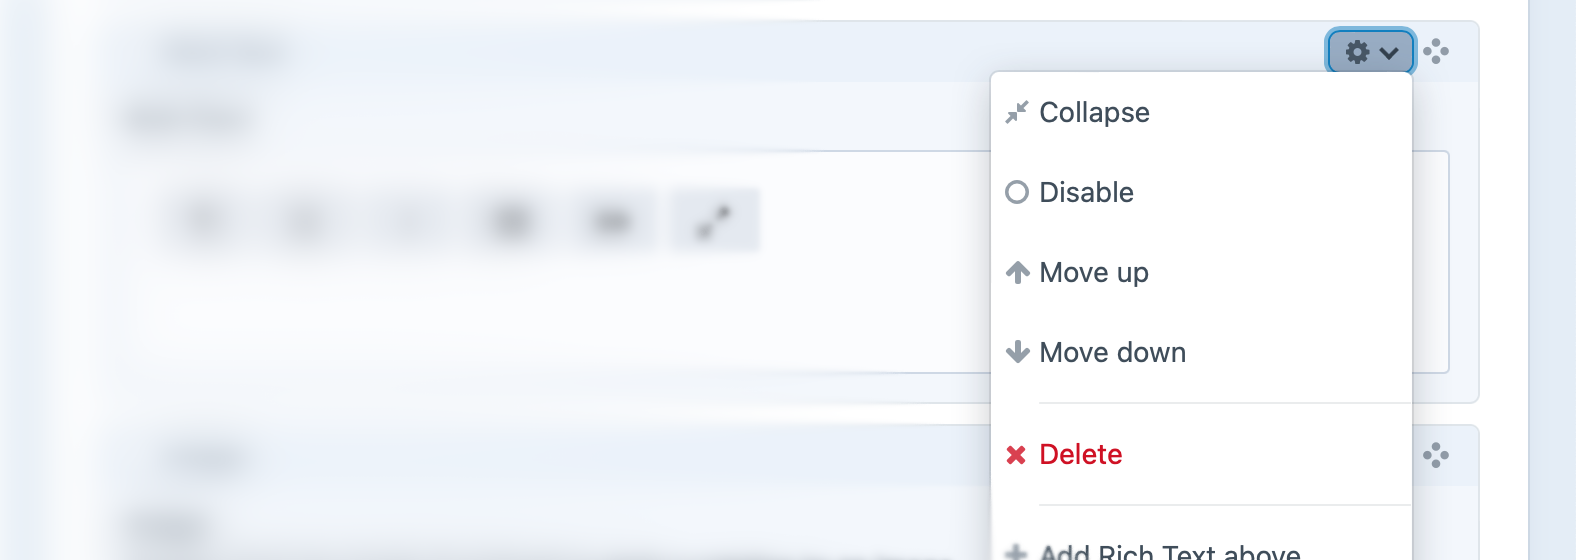
If multiple blocks are selected, the Collapse/Expand, Disable/Enable, and Delete options will apply to each of those selected.
You can collapse Matrix blocks by choosing the Collapse menu option or by double-clicking on a block’s title bar. When a block is collapsed, its title bar will show a preview of its content so you can still identify which block it is.
Blocks can also be reordered by dragging the “Move” icon (
You can quickly select all blocks by selecting one and pressing Ctrl/⌘ + A, or selecting a range of blocks starting with the first and then Shift-clicking the last.
# Development
# Querying Elements with Matrix Fields
When querying for elements that have a Matrix field, you can filter the results based on the Matrix field data using a query param named after your field’s handle.
Possible values include:
| Value | Fetches elements… |
|---|---|
':empty:' | that don’t have any Matrix blocks. |
':notempty:' | that have at least one Matrix block. |
100 | that have a Matrix block with an ID of 100. |
[100, 200] | that have Matrix blocks with IDs of 100 or 200. |
| a MatrixBlock (opens new window) object | that have the Matrix block. |
| an array of MatrixBlock (opens new window) objects | that have the Matrix blocks. |
{# Fetch entries with a Matrix block #}
{% set entries = craft.entries()
  .myFieldHandle(':notempty:')
  .all() %}
{# Fetch entries with Matrix block ID 100 or 200 #}
{% set entries = craft.entries()
  .myFieldHandle([100, 200])
  .all() %}
# Working with Matrix Field Data
If you have an element with a Matrix field in your template, you can access its blocks using your Matrix field’s handle:
That will give you a Matrix block query, prepped to output all the enabled blocks for the given field.
To loop through all the blocks, call all() (opens new window) and loop over the results:
{% set blocks = entry.myFieldHandle.all() %}
{% if blocks|length %}
  <ul>
    {% for block in blocks %}
      <!-- ... -->
    {% endfor %}
  </ul>
{% endif %}
All the code you put within the for-loop will be repeated for each Matrix block in the field. The current block will get set to that block variable we’ve defined, and it will be a craft\elements\MatrixBlock (opens new window) model.
Here’s an example of what the template might look like for a Matrix field with four block types (Heading, Text, Image, and Quote). We can determine the current block type’s handle by checking block.type (craft\elements\MatrixBlock::getType() (opens new window)).
{% for block in entry.myFieldHandle.all() %}
  {% if block.type == "heading" %}
    <h3>{{ block.heading }}</h3>
  {% elseif block.type == "text" %}
    {{ block.text|markdown }}
  {% elseif block.type == "image" %}
    {% set image = block.image.one() %}
    {% if image %}
        <img src="{{ image.getUrl('thumb') }}"
          width="{{ image.getWidth('thumb') }}"
          height="{{ image.getHeight('thumb') }}"
          alt="{{ image.title }}"
        >
    {% endif %}
  {% elseif block.type == "quote" %}
    <blockquote>
      <p>{{ block.quote }}</p>
      <cite>– {{ block.cite }}</cite>
    </blockquote>
  {% endif %}
{% endfor %}
This code can be simplified using the switch tag.
If you only want the first block, call one() (opens new window) instead of all(), and make sure it returned something:
If you only want to know the total number of blocks, call count() (opens new window).
{% set total = entry.myFieldHandle.count() %}
<p>Total blocks: <strong>{{ total }}</strong></p>
If you just need to check if blocks exist (but don’t need to fetch them), you can call exists() (opens new window):
You can set parameters on the Matrix block query as well. For example, to only fetch blocks of type text, set the type param:
It’s always a good idea to clone the Matrix query using the clone() function before adjusting its parameters, so the parameters don’t have unexpected consequences later on in your template.
# Saving Matrix Fields
If you have an element form, such as an entry form (opens new window), that needs to contain a Matrix field, you will need to submit your field value in this format:
- sortOrder
- blocks
  - <BlockID_1>
    - type
    - fields
      - <FieldHandle_1>
      - <FieldHandle_2>
  - <BlockID_2>
    - type
    - fields
      - ...
sortOrder should be submitted as an array of all the block IDs you wish to persist (as well as any new block IDs), in the order they should be saved.
If you want all existing blocks to persist in the same order they are currently in, then use this template to define your sortOrder array:
{% if entry is defined %}
  {% for blockId in clone(entry.myFieldHandle).anyStatus().ids() %}
    {{ hiddenInput('fields[myFieldHandle][sortOrder][]', blockId) }}
  {% endfor %}
{% endif %}
All of your block data should be nested under blocks, indexed by their IDs. Each block must submit its type and custom field data nested under a fields array.
Here’s how you can output form fields for existing blocks, for a Matrix field with two block types (text and image):
{% if entry is defined %}
  {% for block in entry.myFieldHandle.all() %}
    {# Prefix the block's input names with `fields[myFieldHandle][blocks][<BlockID>]` #}
    {% namespace "fields[myFieldHandle][blocks][#{block.id}]" %}
      {{ hiddenInput('type', block.type) }}
      {% switch block.type %}
        {% case 'text' %}
          <textarea name="fields[<TextFieldHandle>]">
            {{- block.<TextFieldHandle>|raw -}}
          </textarea>
        {% case 'image' %}
          {% set images = block.<AssetsFieldHandle>.all() %}
          {% if images|length %}
            <ul>
              {% for image in block.<AssetsFieldHandle>.all() %}
                <li>
                  {{ image.getImg({ width: 100, height: 100 }) }}
                  {{ hiddenInput('fields[<AssetsFieldHandle>][]', image.id) }}
                </li>
              {% endfor %}
            </ul>
          {% endif %}
      {% endswitch %}
    {% endnamespace %}
  {% endfor %}
{% endif %}
Outputting form fields for existing blocks is completely optional. As long as the block IDs are listed in the sortOrder array, they will persist even if they are missing from the form data.
To show a “New Block” form, first come up with a temporary ID for the block, prefixed with new:. For example, new:1, new:2, etc.
Append the temporary ID to the sortOrder array, and use it when outputting the block’s form inputs.
You’ll probably want to include a JavaScript-powered component to the field that appends new block inputs to the form. New blocks should have an “ID” of new:X, where X is any number that is unique among all new blocks for the field.
For example, the first new block that is added to the form could have an “ID” of new:1, so its type input name would end up looking like this:
<input type="hidden" name="fields[myFieldHandle][new:1][type]" value="text" />
Then define the form inputs for any additional blocks that should be appended to the input.
{{ hiddenInput('fields[myFieldHandle][sortOrder][]', 'new:1') }}

{# Prefix the block's input names with `fields[myFieldHandle][blocks][new:1]` #}
{% namespace "fields[myFieldHandle][blocks][new:1]" %}
  {{ hiddenInput('type', 'text') }}
  <textarea name="fields[<TextFieldHandle>]"></textarea>
{% endnamespace %}