Sites & Localization
A single Craft installation can power any number of websites.
Sites let you expand your presence to different domains, use unique templates, and intelligently localize content.
Craft’s multi-site feature is for sites with the same publishing team. You manage the multi-site content at the entry level, with the ability to enable sections you want included in a site.
Craft’s multi-site feature is not meant for managing multiple projects that have no relationship to one another. The Author experience is based on the assumption that some content is shared between them, and that users have some overlap in their capabilities or responsibilities.
#Creating a Site
The first site is created when you install Craft, using the Site Name provided via the setup GUI (opens new window) or CLI. Additional sites are created via
- Settings
- Sites
#Site Groups
Site groups allow you to organize your sites together by commonality, like language or site type.
Craft creates the first site group for you (named after the site created during installation) and assigns the default site to that group.
In addition to organization, site groups can be used in conjunction with a section’s Propagation Method, or in some fields’ Translation Method settings.
You can access the current site’s group information using currentSite.group:
{# @var currentSite craft\models\Site #}
Site ID:          {{ currentSite.id }}
Site Handle:      {{ currentSite.handle }}
Site Name:        {{ currentSite.name }}
Site Language:    {{ currentSite.language }}
Is Primary Site?: {{ currentSite.primary }}
Base URL:         {{ currentSite.baseUrl }}

{# @var siteGroup craft\models\SiteGroup #}
{% set siteGroup = currentSite.group %}
Site Group Name:  {{ siteGroup.name }}
#Language
A site’s language determines how Craft formats dates, times, and numbers, and which static message translations are used, in the front-end.
In your templates, you can access the current site’s language setting via craft.app.language:
<html lang="{{ craft.app.language }}">
  <head>
    <title>{{ siteName }}</title>
  </head>
  <body>
    {# ... #}
  </body>
</html>
The current language can be used to conditionally display certain parts of a page—or you can create site-specific templates in your templates/ directory.
#Primary Site
Craft sets the default site (created during installation) as the Primary site, meaning Craft will load it by default on the front end, if it is unable to determine which site to load. If you only have one site then you cannot disable it as the Primary site.
You can change the primary site once you’ve created at least one other—Craft internally makes sure that only one site is marked as primary at any given time.
#Site URL
Each site has a Base URL that determines how Craft routes and generates links.
Multiple sites can share the same hostname and be distinguished by path (like https://craftcms.com/ and https://craftcms.com/de/), or they can have different hostnames entirely (like https://craftcms.com/ and https://de.craftcms.com/).
If you want to create a site with a different hostname, you must configure your server to handle traffic for it. The hostname can either point to the same web root as your current site, or its own web root (with unique .htaccess and/or entry script).
If you have multiple sites using different root domains like https://site-a.com and https://site-b.com, with the way Craft’s license enforcements works (opens new window), you’ll want to pick one of the domains to access the Craft control panel from for all sites.
The domain you access the control panel from does not affect what sites’ content you can edit!
If your primary site’s Base URL includes a subdirectory (i.e. https://foo.dev/bar/), you should set the baseCpUrl config setting.
#Site Templates
Whenever Craft loads a template, it looks in a subfolder of your templates/ directory with the handle of the current site before trying the global space.
For example, if our site was named Labs (with the handle labs), we could create a templates/labs/ directory with any templates we wanted to override in the “global” space. Suppose the primary site and this Labs mini-site shared most of their page structure, but Labs had a simplified header and footer: we could put {% include '_partials/footer' %} in a shared layout, and Craft would look in the current site’s template folder (templates/labs/_partials/footer.twig), then fall back to the global space (templates/_partials/footer.twig).
(In this example, the layout template itself could also be controlled on a per-site basis!)
#Propagating Entries
Entries support advanced rules for propagating content to other sites. Each section has a Site Settings table, in which you choose the sites its entries can be published in, as well as what their URIs look like.
Channel and Structure sections also include a Propagation Method setting, which determines how content is synchronized across sites, site groups, or languages when created or saved. Single sections only contain one entry (and it’s automatically created when along with the section), so they don’t have propagation settings.
- Only save entries to the site they were created in
Entries are created in a single site, and are not associated with content from other sites. Useful when creating similar content architectures for multiple otherwise unrelated sites—like a news feed for two unrelated products owned by a single company.
Keep in mind that entries created in this way cannot be added to other sites, later.
- Save entries to other sites in the same site group
Entries are created only in sites belonging to the same Site Group, and are not associated with content from sites in other groups. Useful in scenarios where similar content architectures are important across multiple otherwise unrelated sites that are then available in multiple languages—like program-specific event feeds for a recreation center that are translated in multiple languages.
Entries propagated in this way aren’t required to target different languages!
- Save entries to other sites with the same language
Entries are created and managed in all sites that share a language. Useful in situations where the core content represented by an entry is only relevant in its original language, but might still be syndicated to other sites—like an archive of literary works or letters that might be a part of multiple digital museum collections.
- Save entries to all sites enabled for this section
Entries are created and managed in all sites that are enabled in the Site Settings table.
- Let each entry choose which sites it should be saved to
Leave these decisions up to each entry. Use the Status section in the sidebar to create the entry in another site:
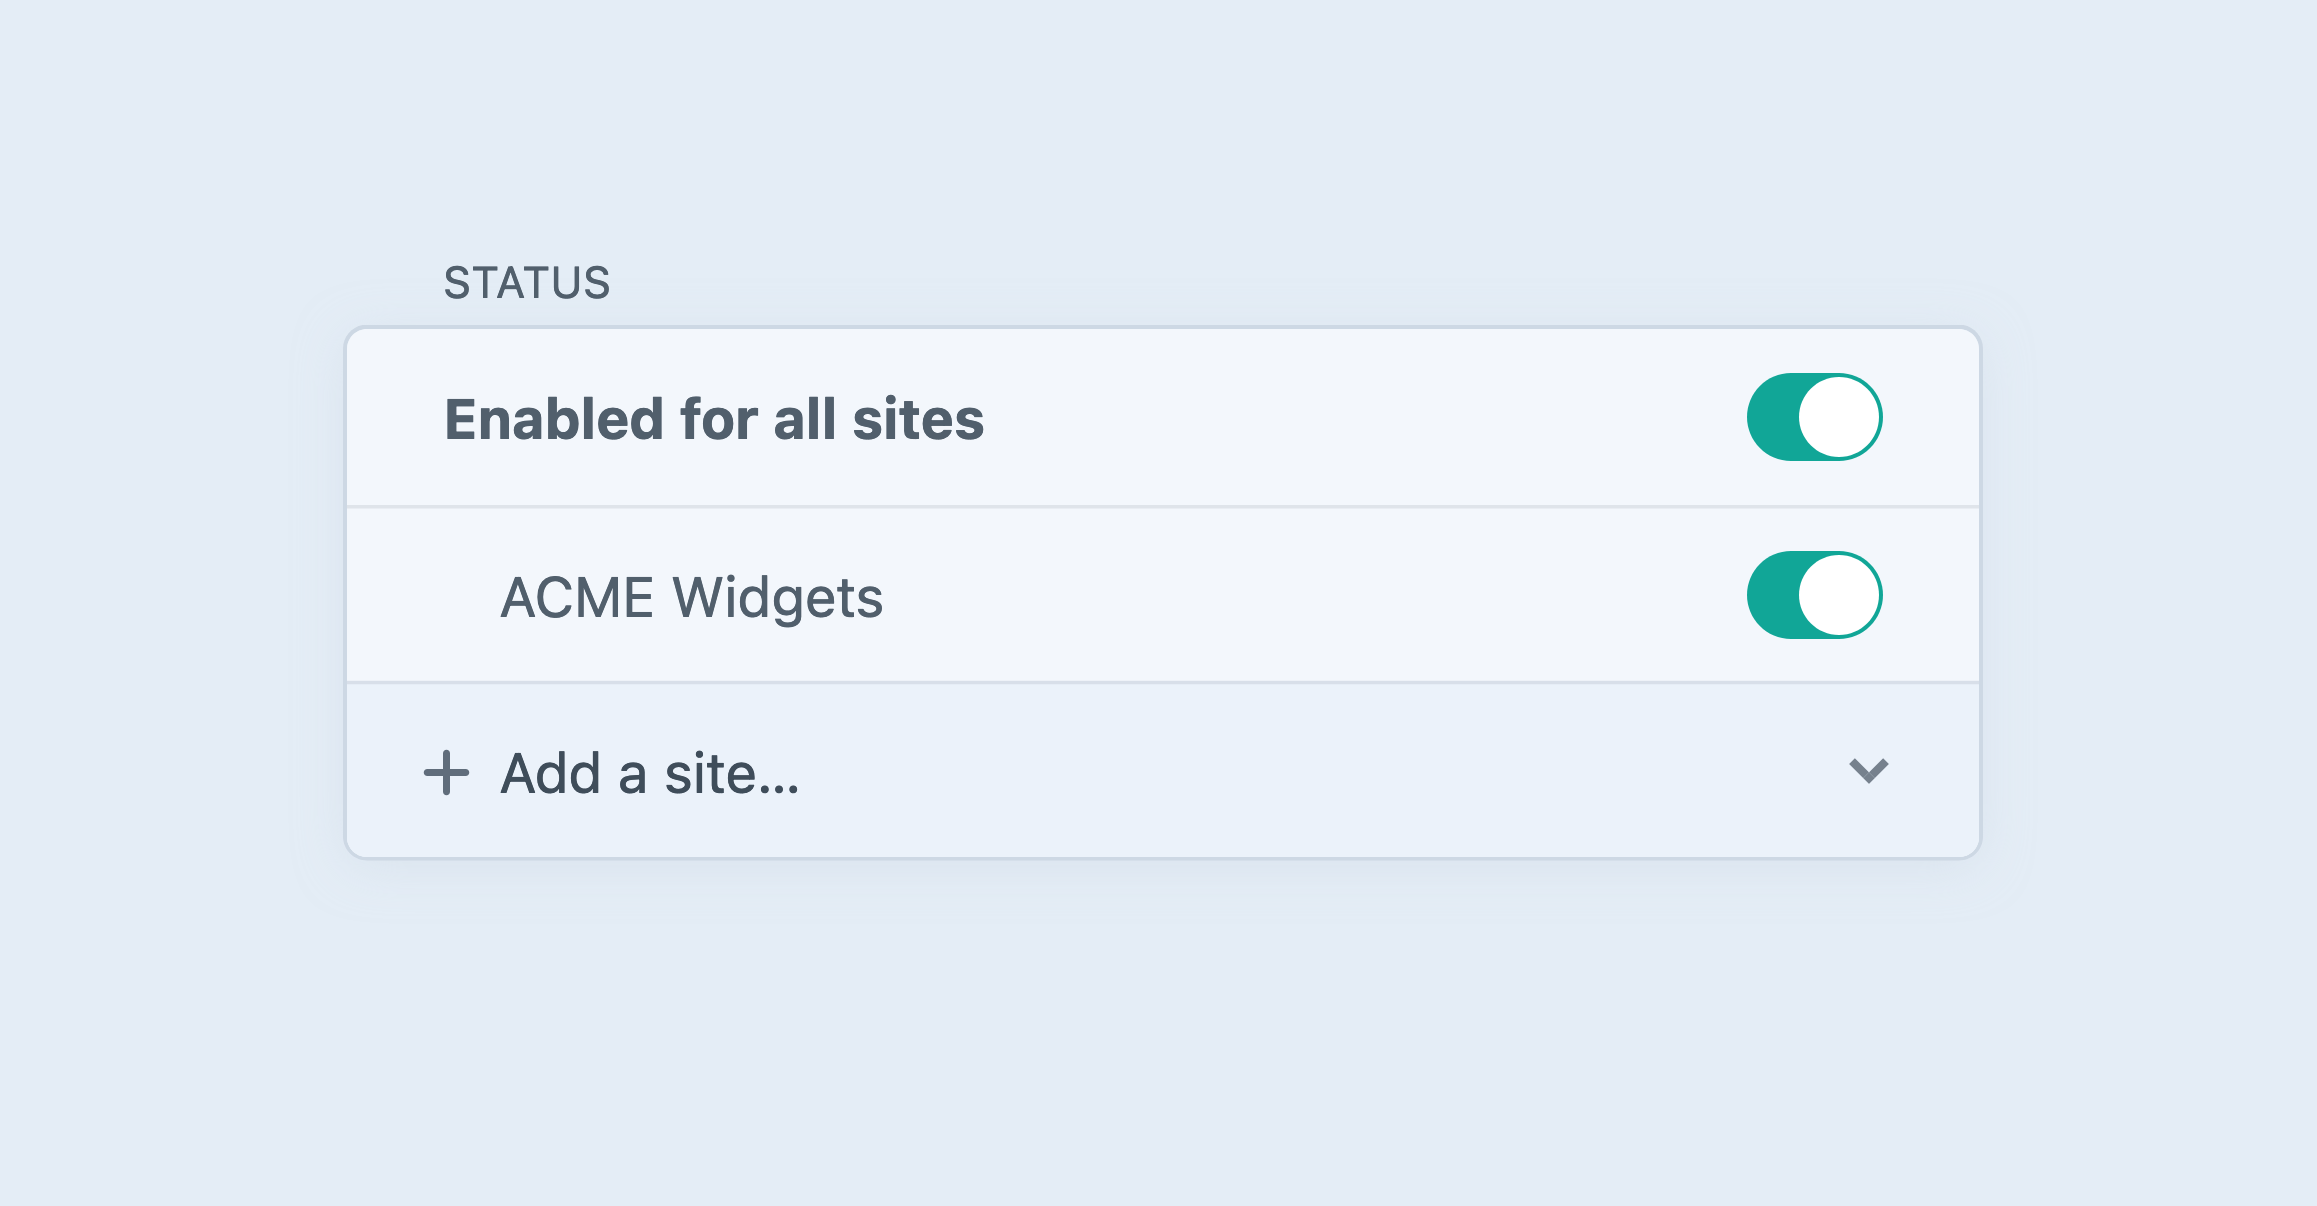
This option also allows entries to be deleted on a per-site basis (rather than just disabled).
When an entry exists in multiple sites, its content can be translated using similar (but even more flexible) rules, on a field-by-field basis.
#Setting Up a New Site
In this section, we’ll walk through the steps of setting up a new site in Craft. This guide assumes you already have Craft installed and the default site setup and configured.
#Step 1: Create the Site
The first step is to create the new site in the Settings screen of your Craft installation.
- Go to
- Settings
- Sites
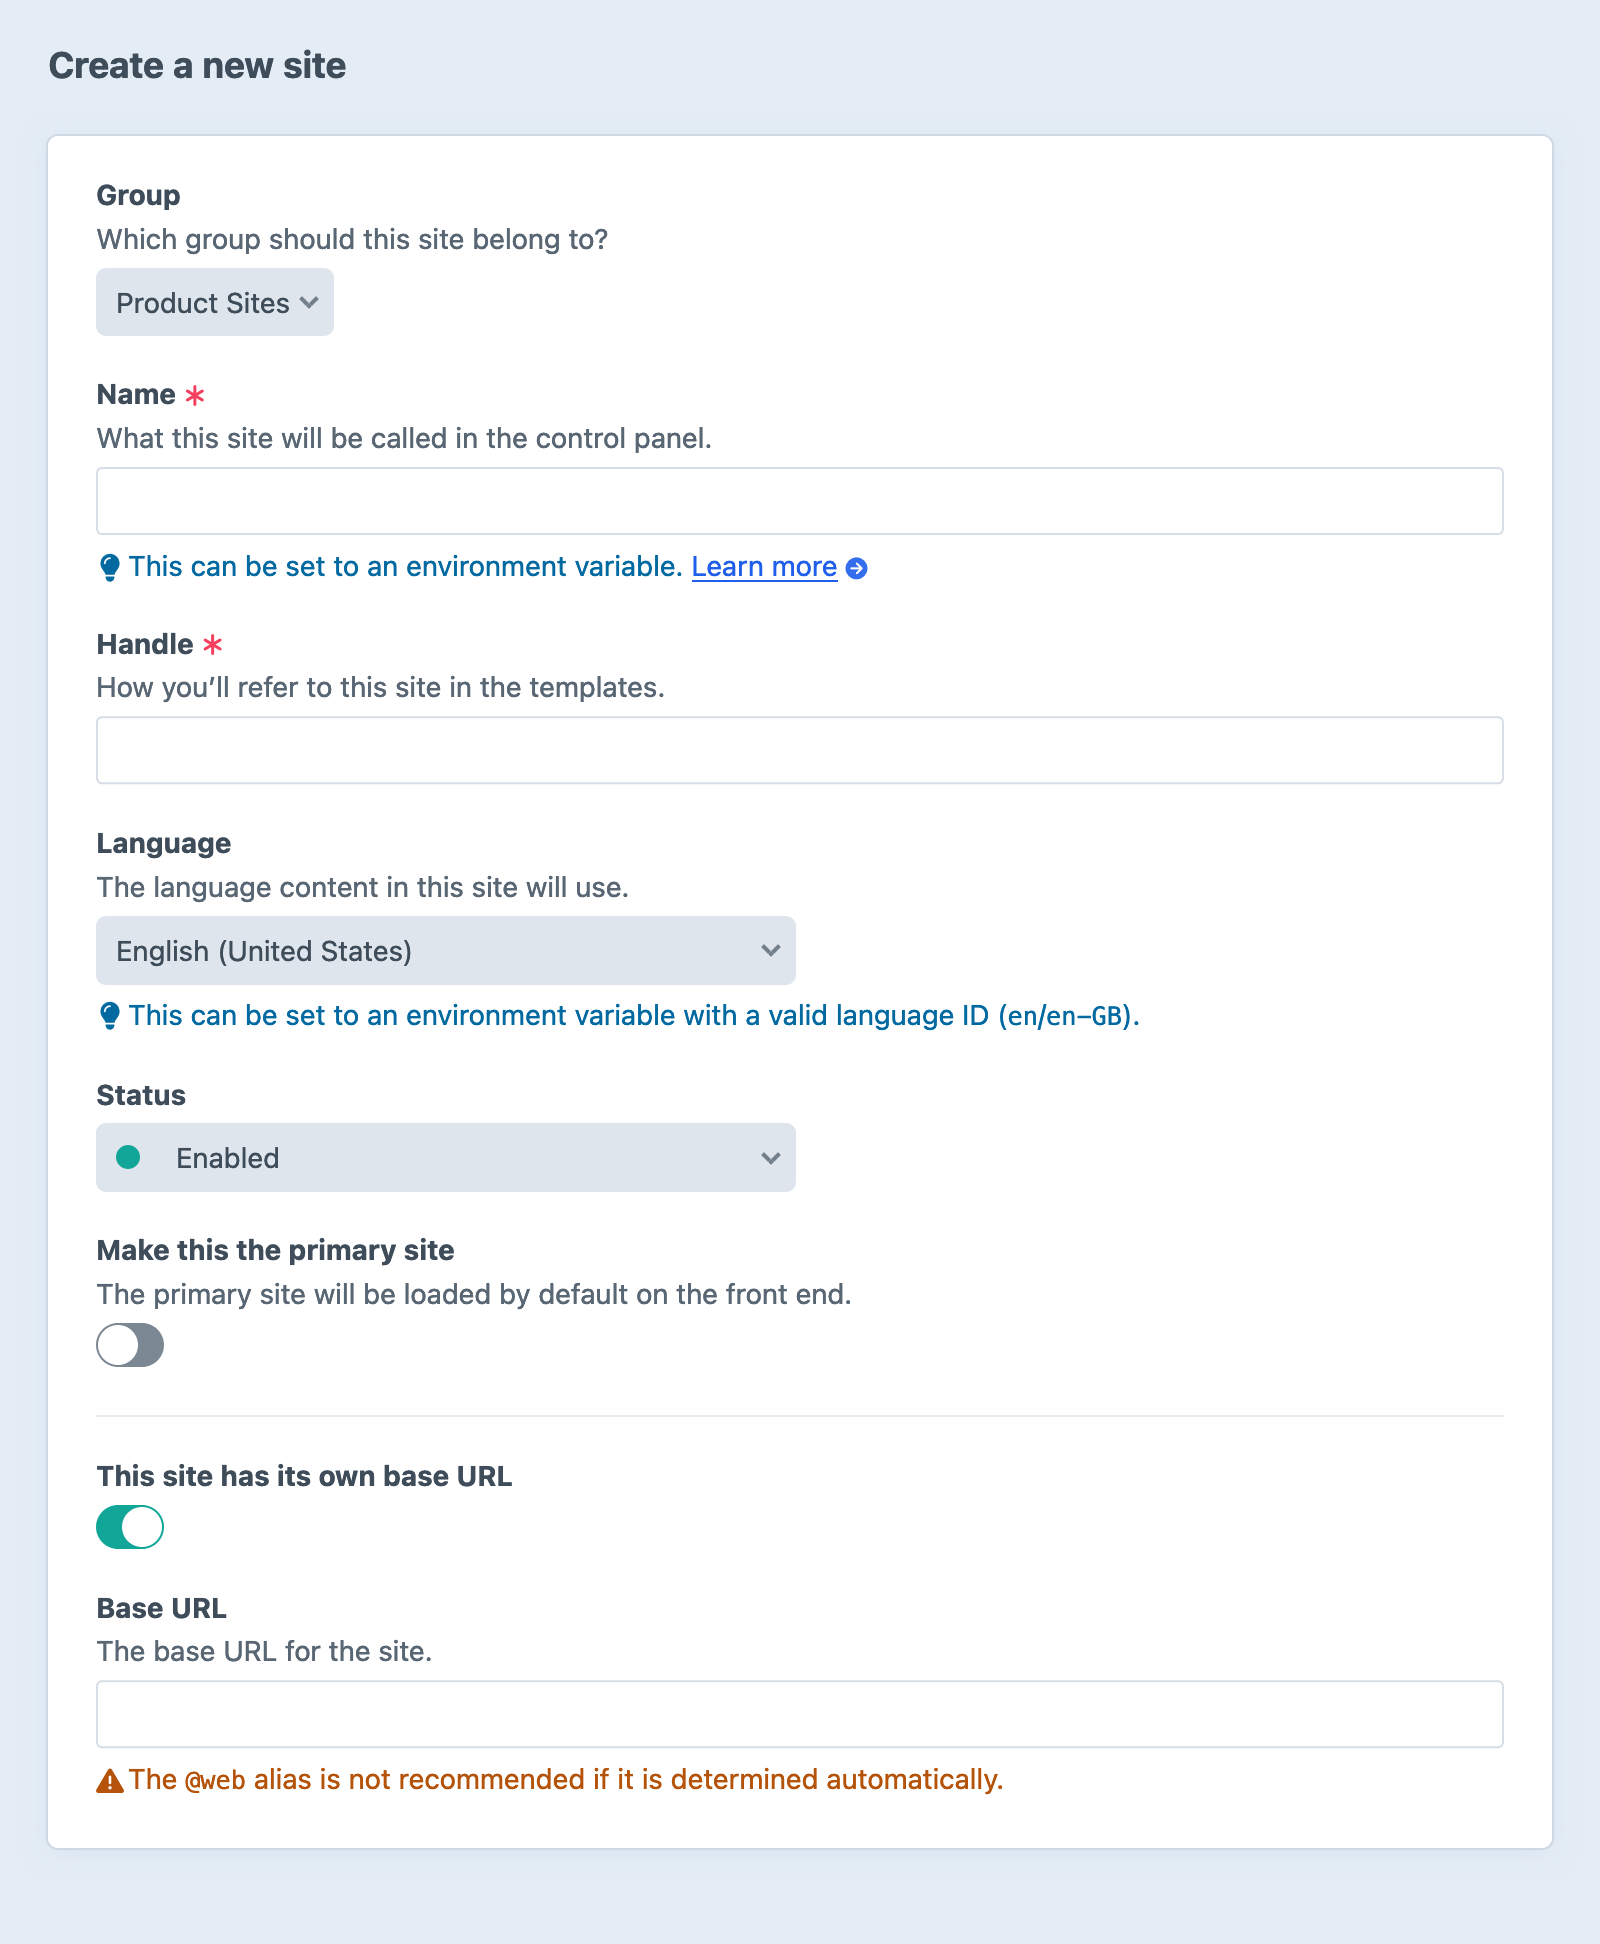
- Use the dropdown menu to choose the group your site should belong to. Site groups are used to control how content is translated.
- Give your site a name. Craft uses the Site Name in the control panel, and makes it available in your templates as
{{ siteName }}. - Based on the Site Name, Craft will generate a Site Handle. You can use the handle to refer to this site in the templates (i.e.
craft.app.sites.getSiteByHandle('beta')), but it has no bearing on front-end URLs. It may appear in control panel URLs. - Choose the language for this site.
- If this site should be the primary or “default” site, toggle Is Primary Site? to enable it. The primary site is loaded whenever Craft can’t match the URL to a known site.
- Check the box for This site has its own base URL and provide a Base URL.
- Save the new site.
#Step 2 (Optional): Create Template Directories
If you’d like to experiment with per-site template overrides, create a new subdirectory within your templates/ folder with the handle of your new site.
#Step 3: Update Sections
- Go into each Section that you want to be available in the new site and enable the site using the Site Settings table.
- Set the Entry URI Format, Template, and Status for the new site in each Section.
- Choose a Propagation Method that suits the section.
#Step 4: Define Translation Method of Fields
By default, custom fields are set to store the same value across all sites. If any fields should have unique values across your sites, then you will need to edit their Translation Method settings.
Multi-instance fields share a Translation Method across all instances. If you need different rules for each instance, it may be better suited as two separate fields.
#Step 5: Test Your Settings
Using new or existing entries, verify that the section, field, and translation method settings work as you expect. View the entry in the front-end to ensure your URLs and templates are loading correctly, as well!
#Step 6: Check Your Asset Settings
If you have any Local asset filesystems, you will need to make sure they (and the files in each volume that depends on them) are available from each of your sites. Relative paths (like uploads/images/) or root-relative paths (like /uploads/images/) may only work coincidentally. Filesystems’ Base URL setting should use a stable, absolute URL like https://craftcms.com/ (or a special alias or environment variable).
Review your translation method for asset titles and alt text to make sure they’re relevant to users and authors!
#Step 7: Configure Your Web Server and DNS
- Configure your web server so the domain (e.g.
labs.craftcms.com) points at theweb/directory. Craft will automatically detect which site is being requested. - Update your DNS records so the domain points at the web server.
#Static Message Translations
Most websites and apps will have some UI messages that are hard-coded into the templates or PHP files. These are called “static messages” in Craft, because they aren’t being written by editors in the CMS as content.
If you’re building a multilingual site or app, then these messages are apt to need to be translated, just like your CMS-driven content.
To do that, Craft employs Yii’s Message Translations (opens new window) feature, and pre-defines special translation categories:
siteis used for messages that belong to the project.appis used for Craft control panel messages.- Each plugin gets its own category as well, based on the plugin’s handle.
#Prep Your Messages
The first step is to run all of your static messages through the translator. If you’re working on a template, use the translate filter (|t). If you’re working in PHP code, use Craft::t() (opens new window).
{# old #}
<a href="/contact">Contact us</a>

{# new #}
<a href="/contact">{{ 'Contact us'|t }}</a>
// old
echo 'Contact us';

// new
echo Craft::t('site', 'Contact us');
#Provide the Translations
Once you’ve prepped a message for translations, you need to supply the actual translation.
To do that, create a new folder in your project’s base directory called translations/, and within that, create a new folder named after the target language’s ID. Within that, create a file named after the translation category you want to create messages for (site.php for project messages, app.php to overwrite Craft’s control panel messages, or <plugin-handle>.php to overwrite a plugin’s messages).
For example, if you want to translate your project’s messages into German, this is what your project’s directory structure should look like:
my-project
├── config
├── ...
└── translations
    └── de
        └── site.php
Now open site.php in a text editor, and have it return an array that maps the source messages to their translated messages:
<?php

return [
    'Contact us' => 'Kontaktiere uns',
];
When Craft is processing the message translation for a German site, “Contact us” will be replaced with “Kontaktiere uns”.
Craft uses |t('site') when showing your custom field names in the control panel, so you can use site.php translations for control panel users, too!
#Message Parameters
Static messages can have placeholder values (opens new window). For example:
<?php

return [
    'Welcome back, {name}' => 'Willkommen zurück {name}',
];
To replace the placeholder values with dynamic values when translating the message, pass the params argument when using the translate filter or calling Craft::t() (opens new window):
<a href="/contact">{{ 'Welcome back, {name}'|t(params = {
  name: currentUser.friendlyName,
}) }}</a>
echo Craft::t('site', 'Welcome back, {name}', [
    'name' => Craft::$app->getUser()->getIdentity()->friendlyName,
]);
#Limitations
Craft has a soft cap of 100 sites, determined by the maxSites property of the Sites (opens new window) service. You can increase this at any time via your application configuration (it’s not a technical or license limitation), but we put it in place as a means of reminding users that sites are not infinitely scalable!
To increase the sites ceiling, add this to your config/app.php file:
return [
    'components' => [
        'sites' => [
            'maxSites' => 5000,
        ],
    ],
];
While it’s possible to run 5000 sites on a single Craft installation, we strongly discourage it. We have found that projects with more than a hundred sites are at significantly higher risk of author experience and performance issues, and are more difficult to maintain and troubleshoot.