Content Block Fields 5.8.0+
The content block field semantically groups existing fields into a reusable bundle, and stores content as a nested element.
#Settings
Content block fields’ settings look like a combination of a field and an entry type (or any other field layout provider).
#Field Layout
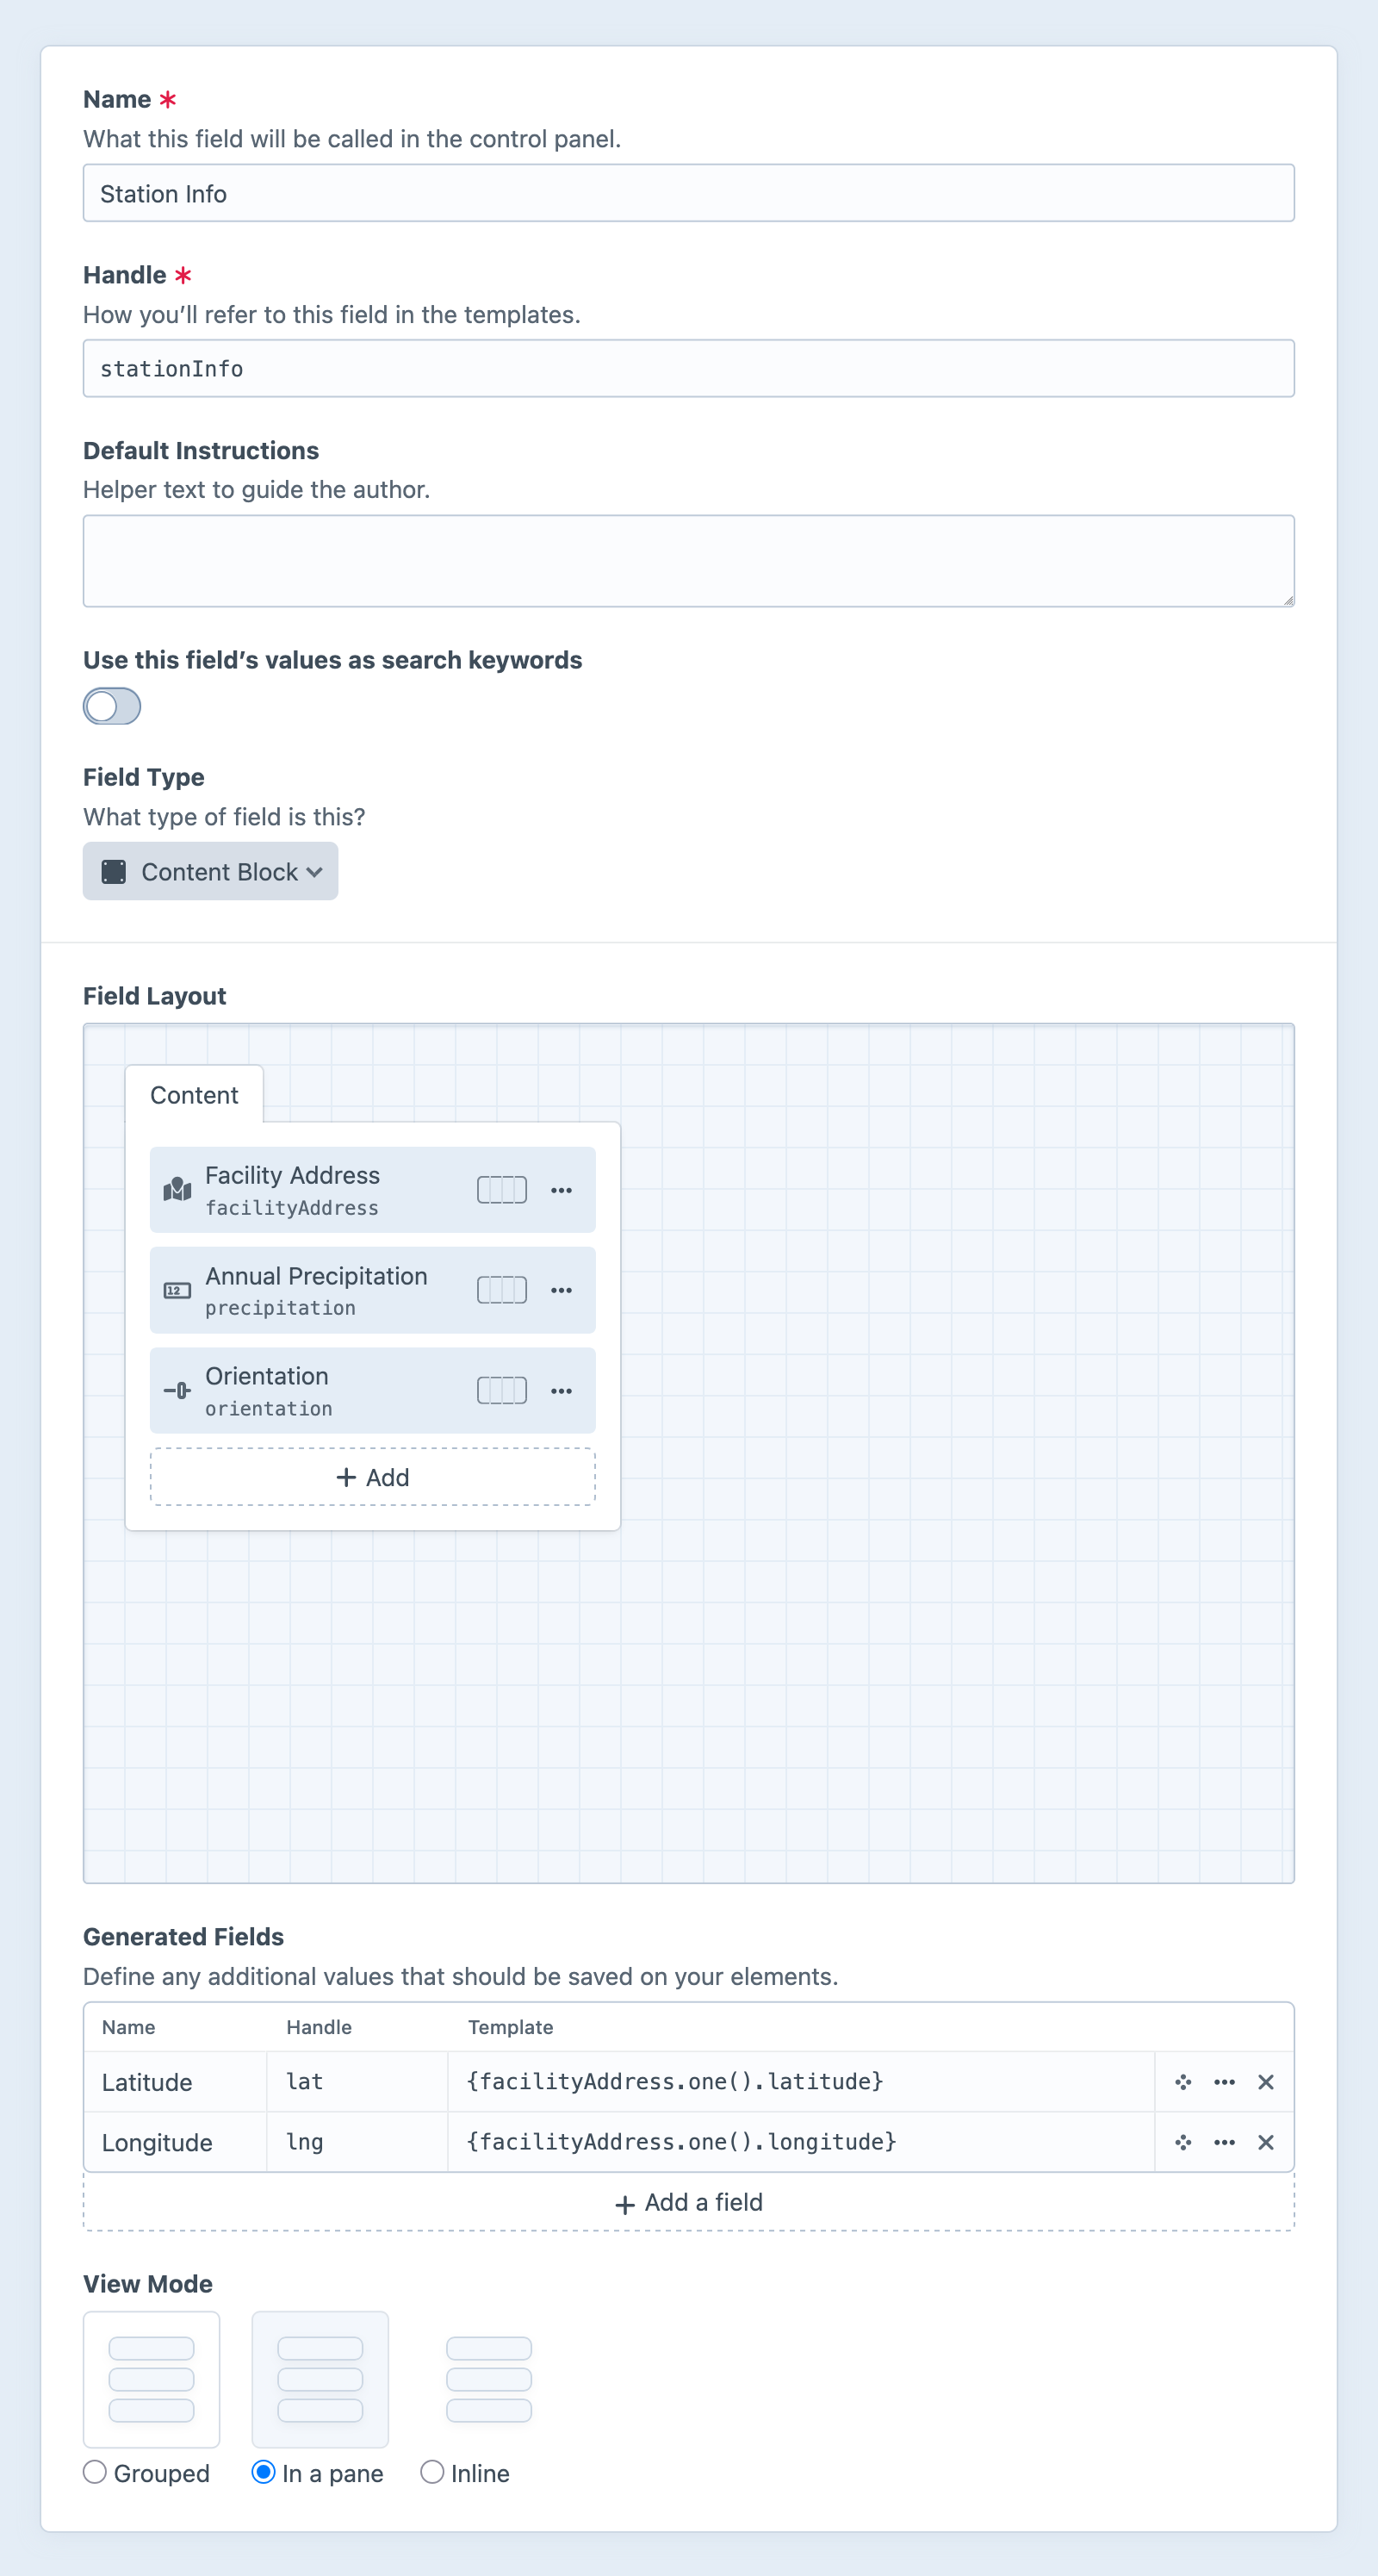
The primary feature is a field layout designer, in which you choose the nested fields. This behaves just like other field layout designers, except that it is limited to a single “tab.” The Content label is never displayed to authors.
Content block fields cannot be nested within other content block fields, as the nested elements are created and displayed directly in-line with the rest of the owner. If you need an arbitrarily-deep set of nested elements, consider the Matrix field.
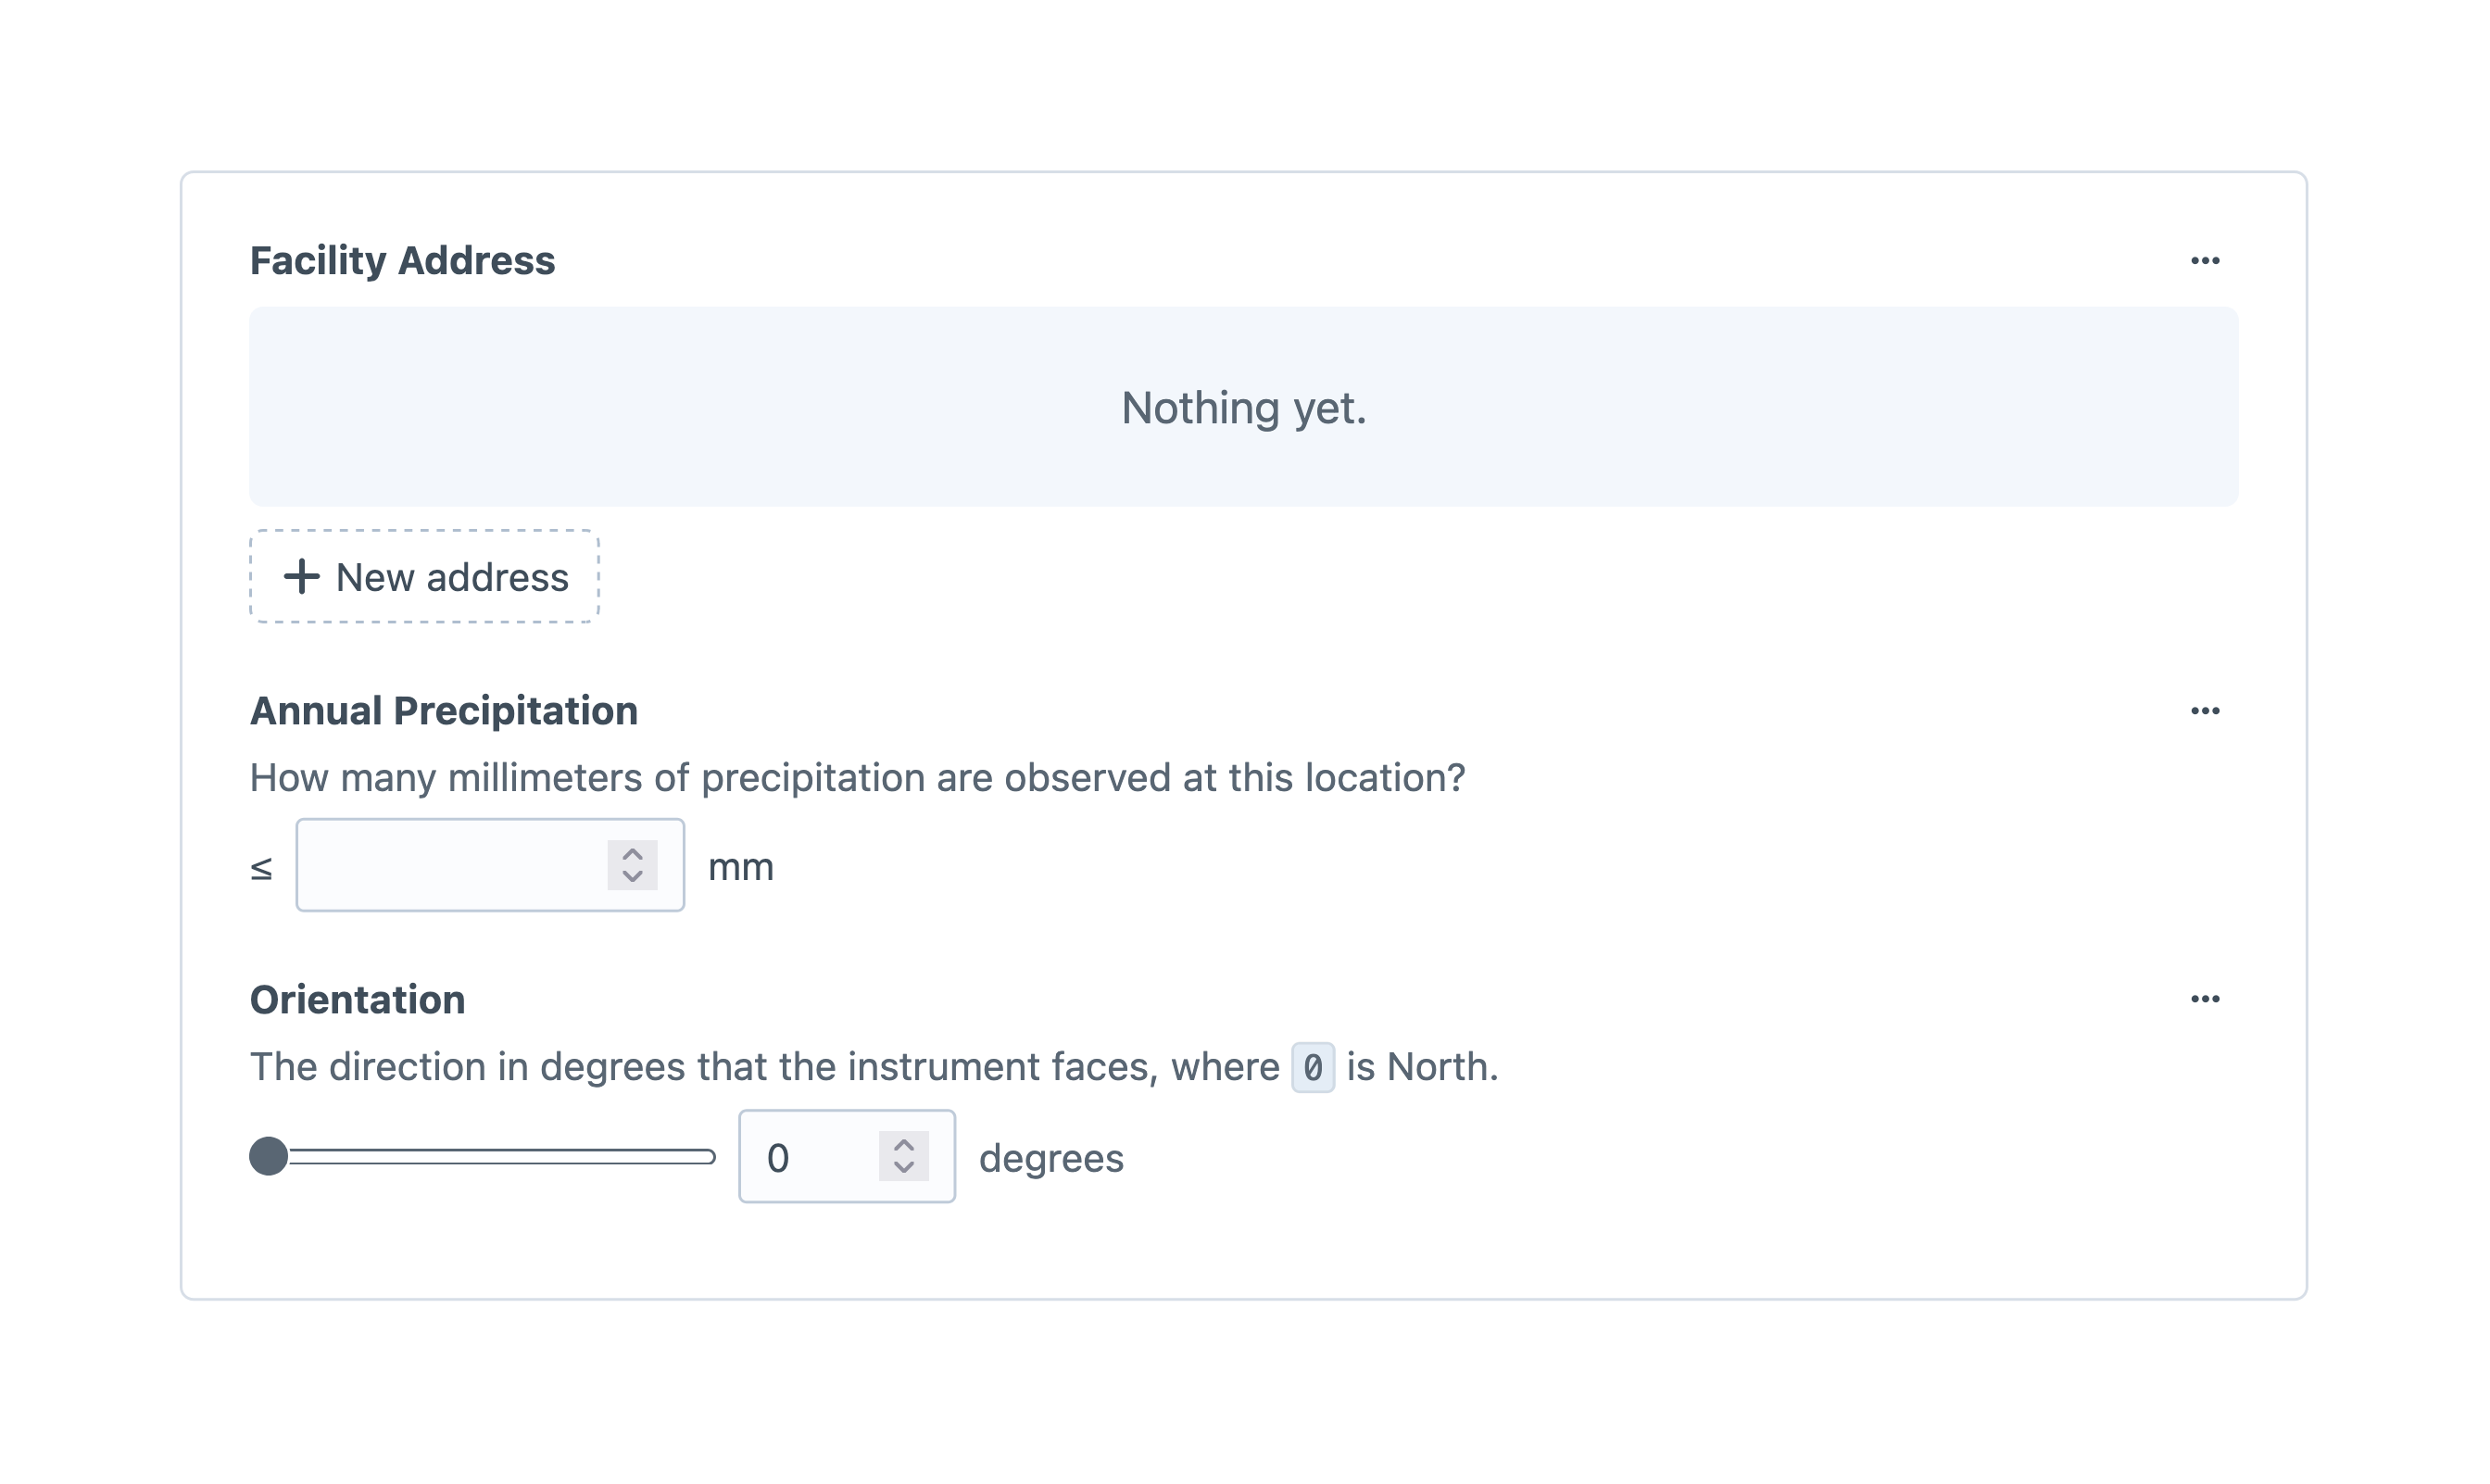
Nested fields can be selected as columns in their owners’ element indexes and cards. 5.9.0+ Assets fields within content blocks can also be used as the source of their owner’s thumbnails. 5.9.6+
#Generated Fields
Each generated field defined in the field layout is saved on the content block element itself, not its owner.
This means a generated field is still accessed via the content block field’s handle; in the examples above, that would be entry.stationInfo.latitude and entry.stationInfo.longitude.
#View Mode
You can display content block fields in one of three ways:
- Grouped — Nested fields are semantically grouped, and surrounded by a hairline.
- In a pane — Nested fields are semantically grouped, and placed within a shaded “pane.”
- Inline — Nested fields are indistinguishable from the surrounding element form. The content block’s label will still appear unless explicitly hidden via its field layout element settings when added to a field layout.
#Development
Content blocks are lazily loaded along with their owners. You’ll access their content via the content block field’s handle:
<h1>{{ entry.title }}</h1>

<p class="byline">
  {# Format user elements into a list... #}
  {{ collect(entry.authors).select('fullName').join(', ', ', and') }}

  {# ...and supplement with a custom byline: #}
  {% if entry.credits.contributors is not empty %}
    with support from {{ entry.credits.contributors }}
  {% endif %}
</p>

{# Separate photo credits: #}
{% if entry.credits.photographer is not empty %}
  <p class="photo-credits">
    Photos by {{ entry.credits.photographer }}
  </p>
{% endif %}
You do not need to test for the presence of the content block element itself—any time you have a reference to an element, the nested content block will be available, even for newly-created elements in memory.
#Querying Content Blocks
Content blocks do not expose nested fields as element query parameters on their owners. However, nested content can be hoisted onto the owner via generated fields, which are then given corresponding query methods.
#Element Partials
If a content block represents a very specific fragment of HTML throughout your site, you can use an element partial to render it. Create a new file with a path like this (assuming the default partialTemplatesPath setting):
templates/_partials/block/{yourFieldHandle}.twig
Then, wherever that content block is attached to an element, you can output its template:
{# Output the owner’s title... #}
<h1>{{ entry.title }}</h1>

{# ...and render the content block: #}
{{ entry.credits.render() }}
Your content block is available in the template under the block variable, and its owner is accessible as block.owner. Adapting the example from above, you can create a reusable article credits component:
<p class="byline">
  {# Gather authors from the owner... #}
  {{ collect(owner.authors).select('fullName').join(', ', ', and') }}

  {# ...and supplement with fields from the content block: #}
  {% if block.credits.contributors is not empty %}
    with support from {{ contributors }}
  {% endif %}
</p>

{% if block.credits.photographer is not empty %}
  <p class="photo-credits">
    Photos by {{ block.credits.photographer }}
  </p>
{% endif %}
#GraphQL
Retrieving content block field data via GraphQL is as intuitive and transparent as most other scalar field values:
query WeatherStations {
    entries(
      section: "weatherStations"
    ) {
      title
      url

      ... on station_Entry {
        # Immediate nested content block:
        stationInfo {
          precipitation
          orientation

          # Second-level content block:
          coordinates {
            latitude
            longitude
          }
        }
      }
    }
  }
Individual content block elements are not directly accessible on their own, via GraphQL.
#Saving Content Block Fields
Content block field data can be sent alongside the owner’s other fields. Like Matrix, the structure of the field data is somewhat strict:
<form method="post">
  {{ csrfInput() }}
  {{ actionInput('entries/save-entry') }}
  {{ hiddenInput('entryId', station.id) }}

  {# Attributes on the owner: #}
  <input name="title" type="text" value="{{ station.title }}">

  {# Custom field on the owner: #}
  <textarea name="fields[intro]">{{ station.intro }}</textarea>

  <fieldset>
    {# Custom fields on the nested content block: #}
    <input
        name="fields[stationInfo][fields][precipitation]"
        type="number"
        value="{{ station.stationInfo.precipitation }}"
        min="0"
        required>
    <input
      name="fields[stationInfo][fields][orientation]"
      type="range"
      value="{{ station.stationInfo.orientation }}"
      min="0"
      max="360"
      step="0.01"
      required>
  </fieldset>

  <button>Save</button>
</form>
All custom field form values must be nested within a fields key (or whatever key you specify in a separate fieldsLocation param).
Content blocks’ nested field values follow the same pattern.
In the example, stationInfo is our content block field handle, inside which the same structure exists: a fields key containing values indexed by their field handles (precipitation and orientation).
If your content model has additional levels of nested data represented by content blocks, you can continue to build inputs’ name attributes using the same structure.
The next level would look something like fields[stationInfo][fields][coordinates][fields][latitude].
You do not need to include any other identifying information or attributes for the content block.
#Migrating to Content Blocks
Existing projects may find it helpful to consolidate existing fields into a content block for reuse.
Names and handles of fields within a content block cannot be renamed on a per-use basis. You may set new names and handles when adding a field to the content block’s field layout, but not when adding the content block to a field layout.
The process is apt to follow these steps:
- Create a new content block field, and add the fields you wish to group to its field layout;
- Add the new content block field to your element’s field layout (this might be an entry type, asset volume, category group, etc.);
- Commit the project config changes and deploy the update to your live environment;
- Run the appropriate
resave/*commands to copy values into the new content block field:php craft resave/entries --section recipes \ --set credits \ --to "fn(\$element) => ['fields' => ['contributors' => \$element->contributors, 'photographer' => \$element->photographer ?? \$element->featureImage->one()->uploader->fullName ?? null]]" - Return to your development environment and remove the consolidated fields from those field layouts;
- Commit the changes and deploy again;
The command above uses the special “closure” mode for the --to option, in which we’ve set two fields’ values.
You may elect to run individual commands for each nested field, if the command or syntax becomes unwieldy:
# Copy `contributors`:
php craft resave/entries --section recipes \
    --set credits \
    --to "fn(\$element) => ['fields' => ['contributors' => \$element->contributors]]"

# Copy `photographer` from field, falling back to the user who uploaded the cover image:
php craft resave/entries --section recipes \
    --set credits \
    --to "fn(\$element) => ['fields' => ['photographer' => \$element->photographer ?? \$element->featureImage->one()->uploader->fullName ?? null]]]"
Values can be copied from Matrix fields, as well. Assuming a legacy recipeMeta Matrix field was limited to a single block, the command would look something like this:
php craft resave/entries --section recipes \
    --set credits \
    --to "fn(\$entry) => ['fields' => ['contributors' => \$entry->recipeMeta[0]->extraNames, 'photographer' => \$entry->recipeMeta[0]->photographyCredit ?? null]]"