User Management
Users in Craft represent humans that have some relationship with your site or application. They may be control panel users, member accounts, or records that represent people in general. Users implicitly have the ability to create passwords and log in, but must be granted permissions or added to groups to access the control panel or manage content.
The first user account is created during installation. The number of additional users that can be created (and their capabilities) depends on your Craft edition:
- Craft Solo is limited to a single admin user.
- Craft Team New! allows up to five users, and one user group.
- Craft Pro has no limitations on the number of registered users or groups, and supports public registration.
To create a new user, visit the Users control panel screen, then click New user. If you don’t see this item in the control panel navigation, your current user may not have the required permission to register other users.
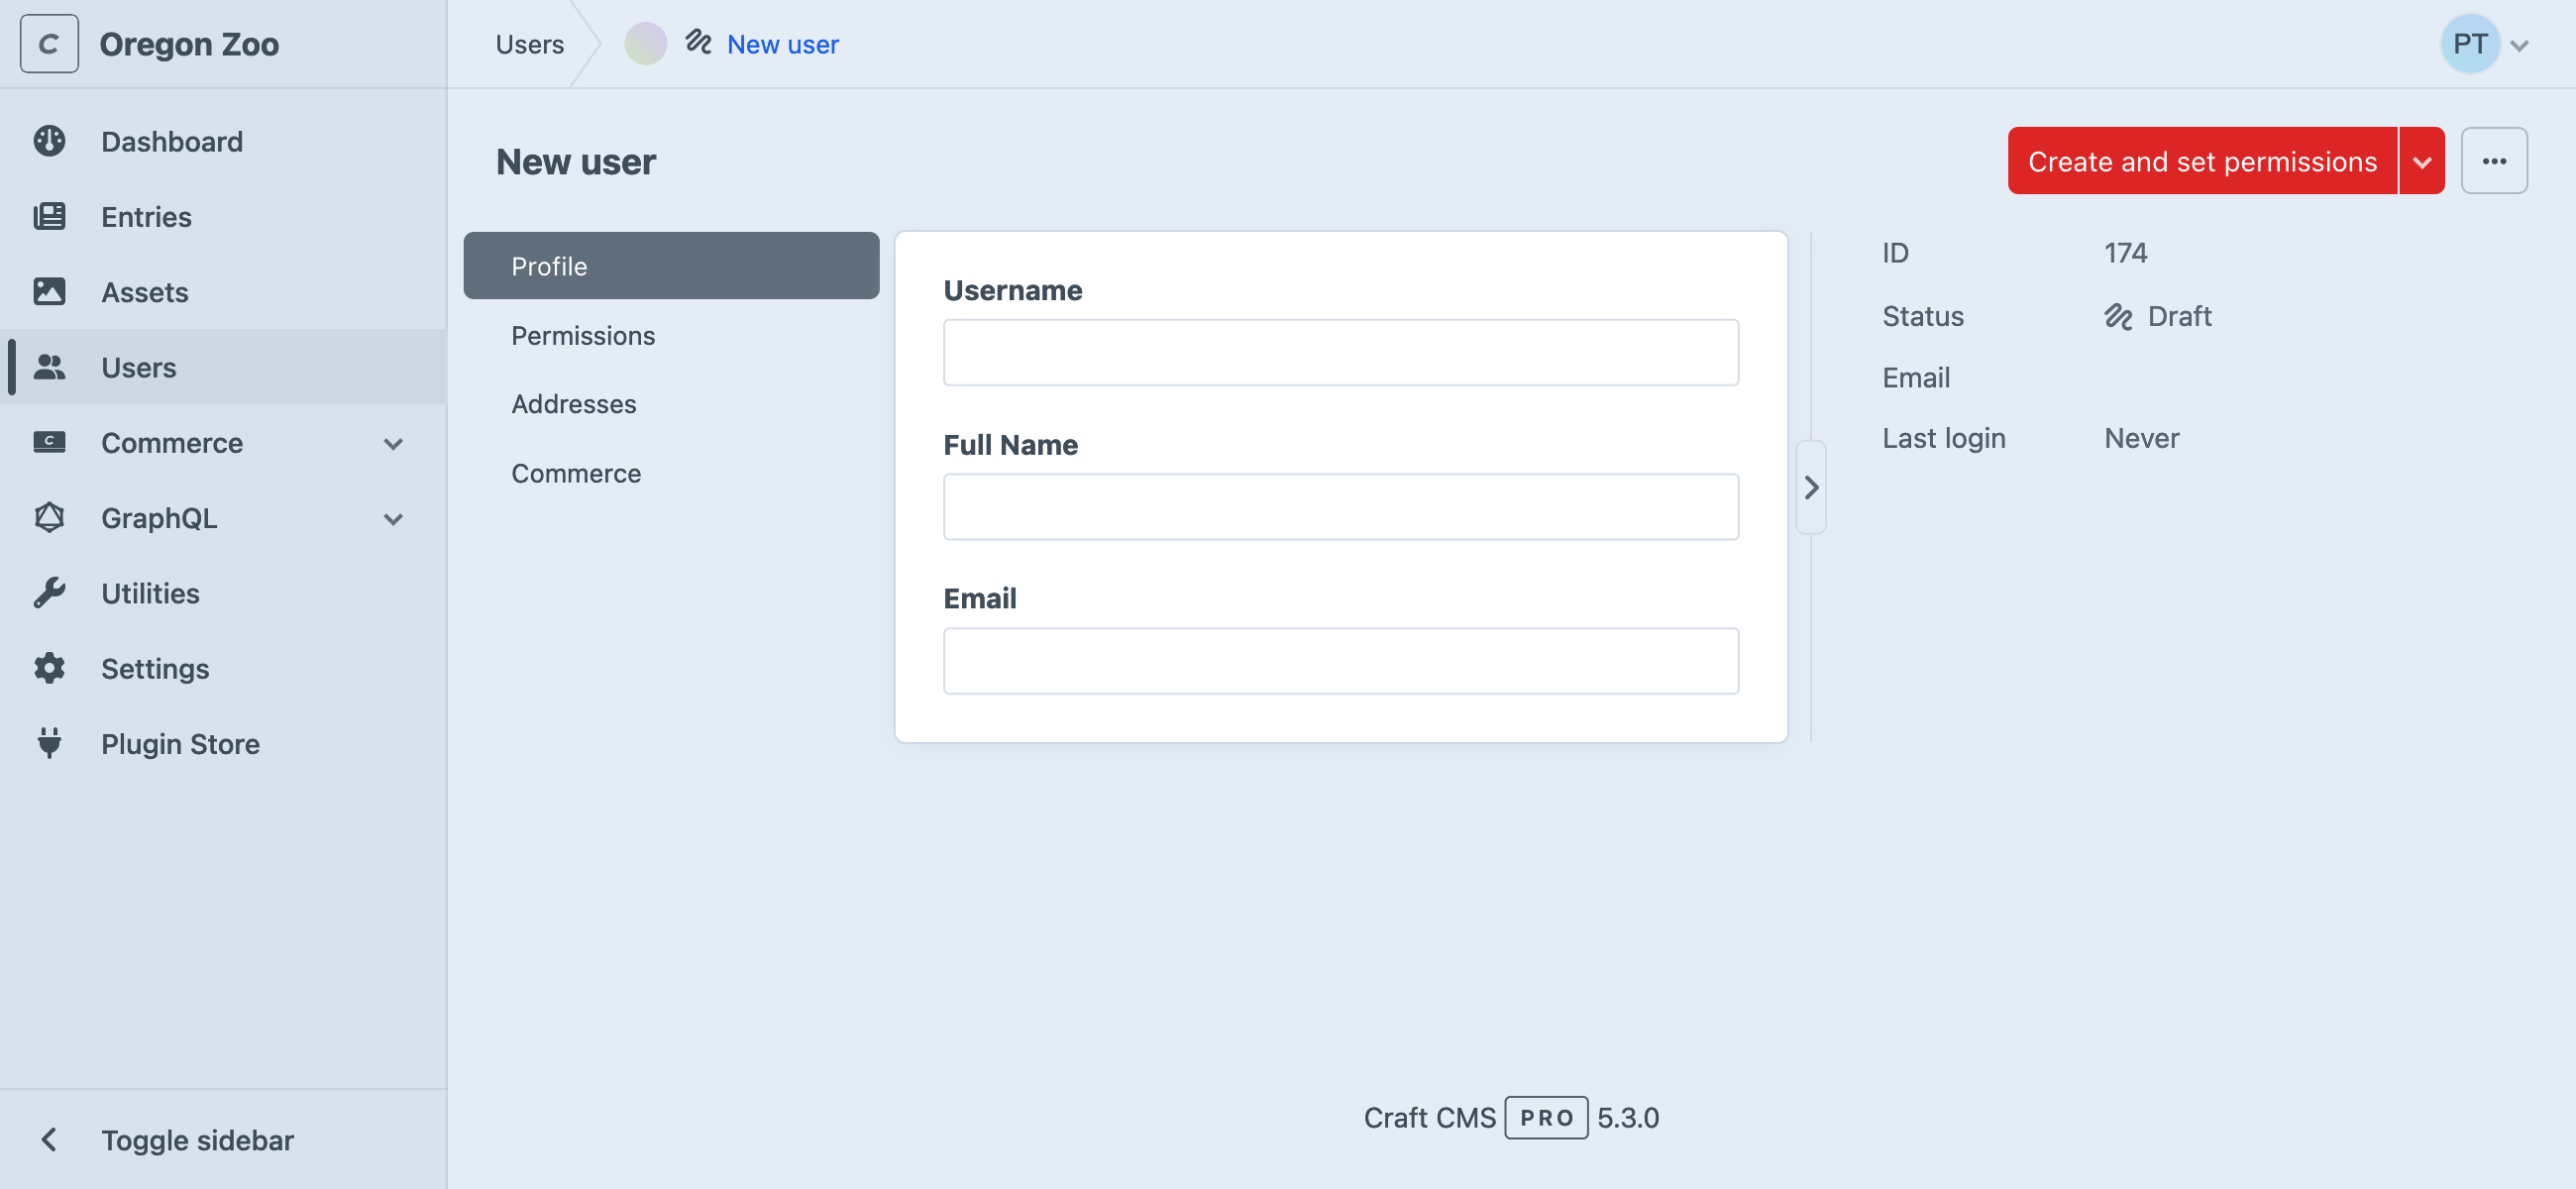
Users must be identified with at least an Email and a Username (or just an email address if the useEmailAsUsername config setting is enabled). Select Create and set permissions
5.3.0+ to validate the user and move on to group and permissions assignment.
If you need to capture some information about a person but don’t have their email address yet, you can select Save as draft from the fly-out menu in the toolbar and come back to the draft later.
The permissions screen will include a Save and send activation email button 5.3.0+ if the user is still Inactive. Users can also be activated by…
- …selecting Send activation email from the action menu in the toolbar;
- …selecting Copy activation URL from the action menu and sending it manually;
- …selecting Activate account without setting a password.
If an account is manually activated by another user without setting a password, the user can request a password reset via a front-end form, or the control panel login screen.
#Statuses
Users may exist in the system in a number of states. A user is typically created in a Pending state (ready to be activated via an activation link), whether via public registration or by another user in the control panel. Changes to a user’s status can happen implicitly (via activation, failed login attempts, etc.) or explicitly (suspension by a moderator), some requiring additional verification by email or an elevated session.
- Active
- An Active user is able perform any task their permissions allow. Users are put in this state following account activation (either via an activation link or action taken by another user). However, an active account does not necessarily have a password—but once one is set (or the current password is reset), they would be able to log in normally.
- Pending
- Public registration creates users in the Pending state, unless the Deactivate users by default setting is enabled in user settings. The only difference between a Pending and Active user is that they have never activated their account with an activation link, or had a user with the Moderate users permission activate it for them.
- Suspended
- Suspended users have been manually locked out of the system by an user with the Moderate Users permission. They will be unable to log in or reset their password.
- Inactive
- New users and users that have been explicitly deactivated are marked as Inactive. An inactive user cannot log in, reset their password, or reactivate their account.
#Special States
- Credentialed
Craft has a special distinction for users who are able to log in or could become able to log in under their own power. Any user that is either Active or Pending is considered Credentialed.
- Locked
When a user makes too many unsuccessful login attempts (according to the maxInvalidLogins and invalidLoginWindowDuration settings), their account will be Locked. Another user with the Moderate users permission can manually unlock a user in this state at any time, or the user can wait until the cooldownDuration elapses and try again.
User locking is an automatic abuse-prevention behavior, not a moderation tool. If you need to prevent someone from accessing the site or control panel, suspend or deactivate the user.
- Trashed
Like other elements, users can be soft-deleted. A trashed user cannot log in or restore themselves, and the user may be garbage-collected after remaining trashed for the configured softDeleteDuration.
#Settings
The behavior of Craft’s user registration and authentication system is governed by a handful of config settings, and a few options (managed via
- Settings
- Users
- Settings
#Project Config
- User Photo Location: Which volume user profile assets are stored in. Files are always uploaded directly to a profile, and cannot be selected from the existing asset library.
- Require two-step verification: Choose which user groups (if any) are required to configure a two-step verification method. After Craft 5.6 (opens new window), this setting affects all matching users, not just those with control panel access.
- Verify email addresses: A user must demonstrate they have access to an email address before they can activate their account, or change the email on an existing account.
- Allow public registration: Whether or not users can register from the front-end.
- Validate custom fields on public registration: When registering via the front-end, require a complete user profile (including any fields marked as Required in the user field layout).
- Deactivate users by default: Place users in the Inactive state after registering, rather than sending an activation email. Another user with the Moderate users permission must activate the user.
- Default User Group: The group that publicly-registered users are added to, if any.
In addition, the users field layout and addresses field layout are stored in project config.
#Config Files
A combination of user-specific, session, and security settings are tracked via the General configuration file.
A summary of these settings (as they relate to front-end development) is available in the Additional Tools section, below.
#Admin Accounts
Admin users are special accounts that can do everything within Craft, including some things that don’t have explicit permissions:
- Modify all Settings (in environments with admin changes are enabled);
- Make other users admins (in editions that support multiple users);
- Administrate other admins (in editions that support multiple users);
The user you create when installing Craft is an admin by default. Users in Craft Team can either have permissions from the single group, or be an admin.
Considering how much damage an admin can do, we strongly advise reserving this role for key members of your team or organization who cannot fulfill their responsibilities without it. Whenever possible, design a permissions scheme that grants only the necessary capabilities.
To make a user an admin, you must be logged in as an existing admin. Find the user in the Users screen, then select the Permissions tab, and enable Admin. The individual permissions checkboxes will be hidden, as admin implicitly have all permissions. While admin can be part of groups, those groups’ permissions have no bearing on their capabilities unless they are stripped of the admin designation later.
You can also audit and create admin users from the command line.
#User Groups Pro
User Groups help organize your site’s user accounts, and uniformly set permissions on them.
To create a new User Group, go to Settings → Users and press + New user group. Groups have a Name and Handle, plus any Permissions you want every user within the group to have.
After you create your groups, you can assign users to groups by going into their account settings and choosing the Permissions tab. Permissions granted by groups are additive, so a user in multiple groups receives the combined permissions of those groups (as well has any permissions granted explicitly to that user). Removing a user from a group does not revoke permissions that are granted by another group they are a member of!
Users in Craft Team belong to a single “Team” user group, the permissions for which are managed via
- Settings
- Users
- User Permissions
#Permissions Team Pro
Permissions govern what users can do—like access the control panel, edit content within certain sections, create and moderate other users, etc. You can assign these permissions directly to users, or via user groups. Permissions applied to a user group are inherited by all users belonging to it.
Make sure you trust users with access to settings that allow users to provide Twig code, like the System Messages utility. It’s possible to do malicious things via Twig (like permissions escalation), so these permissions are intended primarily for trusted admins and developers.
The permissions Craft comes with are:
| Permission | Handle |
|---|---|
| Access the site when the system is off | accessSiteWhenSystemIsOff |
| Access the control panel | accessCp |
↳ Access the control panel when the system is offline | accessCpWhenSystemIsOff |
↳ Perform Craft CMS and plugin updates | performUpdates |
↳ Access Plugin Name | accessPlugin-[PluginHandle] |
| View users | viewUsers |
↳ Edit users | editUsers |
↳ Register users | registerUsers |
↳ Moderate users | moderateUsers |
↳ Administrate users | administrateUsers |
↳ Impersonate users | impersonateUsers |
↳ Assign user permissions | assignUserPermissions |
↳ Assign users to this group | See note. |
↳ Assign users to Group Name | assignUserGroup:[UserGroupUID] |
↳ Delete users | deleteUsers |
| Edit Site Name | editSite:[SiteUID] |
| View entries | viewEntries:[SectionUID] |
↳ Create entries | createEntries:[SectionUID] |
↳ Save entries | saveEntries:[SectionUID] |
↳ Delete entries | deleteEntries:[SectionUID] |
↳ View other users’ entries | viewPeerEntries:[SectionUID] |
↳ Save other users’ entries | savePeerEntries:[SectionUID] |
↳ Delete other users’ entries for site | deletePeerEntriesForSite:[SectionUID] |
↳ Delete other users’ entries | deletePeerEntries:[SectionUID] |
↳ View other users’ drafts | viewPeerEntryDrafts:[SectionUID] |
↳ Save other users’ drafts | savePeerEntryDrafts:[SectionUID] |
↳ Delete other users’ drafts | deletePeerEntryDrafts:[SectionUID] |
| Edit Global Set Name | editGlobalSet:[GlobalSetUID] |
| View categories | viewCategories:[CategoryGroupUID] |
↳ Save categories | saveCategories:[CategoryGroupUID] |
↳ Delete categories | deleteCategories:[CategoryGroupUID] |
↳ View other users’ drafts | viewPeerCategoryDrafts:[CategoryGroupUID] |
↳ Save other users’ drafts | savePeerCategoryDrafts:[CategoryGroupUID] |
↳ Delete other users’ drafts | deletePeerCategoryDrafts:[CategoryGroupUID] |
| View assets | viewAssets:[VolumeUID] |
↳ Save assets | saveAssets:[VolumeUID] |
↳ Delete assets | deleteAssets:[VolumeUID] |
↳ Replace files | replaceFiles:[VolumeUID] |
↳ Edit images | editImages:[VolumeUID] |
↳ View assets uploaded by other users | viewPeerAssets:[VolumeUID] |
↳ Save assets uploaded by other users | savePeerAssets:[VolumeUID] |
↳ Replace files uploaded by other users | replacePeerFiles:[VolumeUID] |
↳ Remove files uploaded by other users | deletePeerAssets:[VolumeUID] |
↳ Edit images uploaded by other users | editPeerImages:[VolumeUID] |
↳ Create subfolders | createFolders:[VolumeUID] |
| Utilities | |
↳ Updates | utility:updates |
↳ System Report | utility:system-report |
↳ PHP Info | utility:php-info |
↳ System Messages | utility:system-messages |
↳ Asset Indexes | utility:asset-indexes |
↳ Queue Manager | utility:queue-manager |
↳ Caches | utility:clear-caches |
↳ Deprecation Warnings | utility:deprecation-errors |
↳ Database Backup | utility:db-backup |
↳ Find and Replace | utility:find-replace |
↳ Migrations | utility:migrations |
You may not see all of these options, initially—only ones that are relevant based on the current content schema will be displayed. For example, everything under View categories will be hidden until you have at least one category group.
Plugins may register their own permissions, which can appear in a top-level group, under Access the control panel, or within Utilities.
See the Extending Craft User Permissions page to learn how to register custom permissions from a module or plugin.
#Checking Permissions
You can check whether the logged-in user has a specific permission using its handle. Replace any bracketed items in the table above with the desired value (So accessPlugin-[PluginHandle] would become accessPlugin-commerce).
{% if currentUser.can('accessCp') %}
  <a href="{{ cpUrl() }}">Visit the Control Panel</a>
{% endif %}
For UUID-driven permissions, you can either hard-code the value in Twig, or look it up dynamically.
{# Store the UUID directly in the template: #}
{% if currentUser.can('createEntries:4fcb3c63-9477-4b5f-8021-874d64f819ce') %}
  <a href="{{ siteUrl('account/vendors/add') }}">Add a Vendor</a>
{% endfor %}
{# Look up the section by its handle: #}
{% set vendorsSection = craft.app.entries.getSectionByHandle('vendors') %}

{# Build the permission handle: #}
{% if currentUser.can("createEntries:#{vendorsSection.uid}") %}
  <a href="{{ siteUrl('account/vendors/add') }}">Add a Vendor</a>
{% endfor %}
This is not strictly necessary, but the handle of a given resource is often much easier to understand in the template context.
UUIDs and handles are safe to use like this because they’re tracked in Project Config and will be consistent across environments, unlike IDs.
If your site or app doesn’t rely on specific permissions to control access to resources, you can check whether the user belongs to a group, instead:
{% requireLogin %}

{% if currentUser.isInGroup('members') %}
  <div class="banner">Thanks for your support!</div>
{% endif %}
#Requiring Permissions
You can also require the logged-in user to have a specific permission to access an entire template:
{% requirePermission 'accessCp' %}
If the requirements are not met, Craft will send a 403 Forbidden response with the site’s error template. Logged-out visitors will be forwarded to the configured loginPath; after signing in, the user will be redirected to the original path—but may still encounter a Forbidden error if their account doesn’t have the correct permissions.
#Forms + Content
When a user is given permissions to edit or create elements that meet certain criteria (say, entries in a specific section), they do not need control panel access to make updates.
When POSTing new data to actions like entries/save-entry (or the more generic elements/save), Craft checks for the appropriate permissions. This means that you can create secure, streamlined content management tools for users, without ever granting them access to the control panel!
Keep in mind that permissions issues are dealt with differently than validation errors, so it’s important to check permissions prior to displaying an edit interface to a user. Attempting to POST updates to an element that the current user cannot edit will produce a 400-level HTTP error, and the changes will be lost. If you want to make only certain fields editable to certain users, add user conditions to the element’s field layout.
#Querying by Permissions
You can look up users with a given permission using the can() method on a user query. To find users belonging to a specific group, use the group() method.
#Customizing Authorization
Any time Craft checks a user’s capabilities in the context of a specific element, it emits a number of events. If the built-in permissions (combined with field layout conditions) are not granular enough to enforce your editorial workflow, you can design arbitrarily complex checks in code.
In a custom module, listen for any of the craft\base\Element (opens new window) EVENT_AUTHORIZE_* events, and set the craft\events\AuthorizationCheckEvent::$authorized (opens new window) property to true when your criteria are met.
use craft\elements\Entry;
use craft\services\Elements;
use craft\events\AuthorizationCheckEvent;

Event::on(
    Entry::class,
    Elements::EVENT_AUTHORIZE_SAVE,
    function(AuthorizationCheckEvent $e) {
        // Make sure the system says they’re capable of this:
        if (!$e->element->canSave($e->user)) {
          return;
        }

        // Is the entry part of a section we care about?
        $section = $e->element->getSection();

        if (!$section || $section->handle !== 'classifieds') {
          return;
        }

        // Ok, they have the relevant permissions.
        // Let’s see if they've accepted the terms of service:
        if (!$e->user->acceptedTos) {
          $e->authorized = false;
        }
    }
);
Setting true or false in a handler shortcuts Craft’s internal checks, and the user’s real system permissions are never evaluated.
Avoid setting either value until you are absolutely certain a user should (or should not) be permitted to perform an action.
Permissions violations can result in confusion and lost data, so your criteria should be stable and well-communicated: in the front-end, this might mean hiding or disabling a link to an entry form so that the user learns about account limitations prior to entering data.
#Preferences
Users have a few settings that govern their experience of the control panel and front-end, including their preferred Language and Formatting Locale, a number of Accessibility features, and (for administrators) debugging tools.

#Authentication New!
Credentialed users in Craft can authenticate with one or more methods. By default, Craft uses a password to verify the user’s identity. In addition to passwords, users can set up two-factor authentication, or add a passkey.
Plugins can also provide authentication methods!
#Time-based, One-Time Passwords
Craft has built-in support for one-time passwords via your favorite authenticator app or password manager. When enabled (via
- Settings
- Users
- Security
If a user loses access to their TOTP provider, they can use one of the recovery codes generated at the time it was set up.
In development environments, you can globally disable two-factor authentication checks with the disable2fa setting—either via general.php, or temporarily by adding a CRAFT_DISABLE_2FA=true environment override.
#Passkeys
Individual users can elect to log in with a Passkey (opens new window). To configure a passkey, visit your user’s account screen via the menu in the upper-right corner of the control panel, then choose Passkeys.
Some browsers and devices share passkeys via their own accounts or cloud services, so you may only need one passkey added to Craft to authenticate on multiple devices.
#Elevated Sessions
The control panel may require users to reauthorize to perform some actions, like removing authentication methods, altering permissions, or modifying GraphQL schemas.
An elevated session’s duration is governed by the elevatedSessionDuration setting.
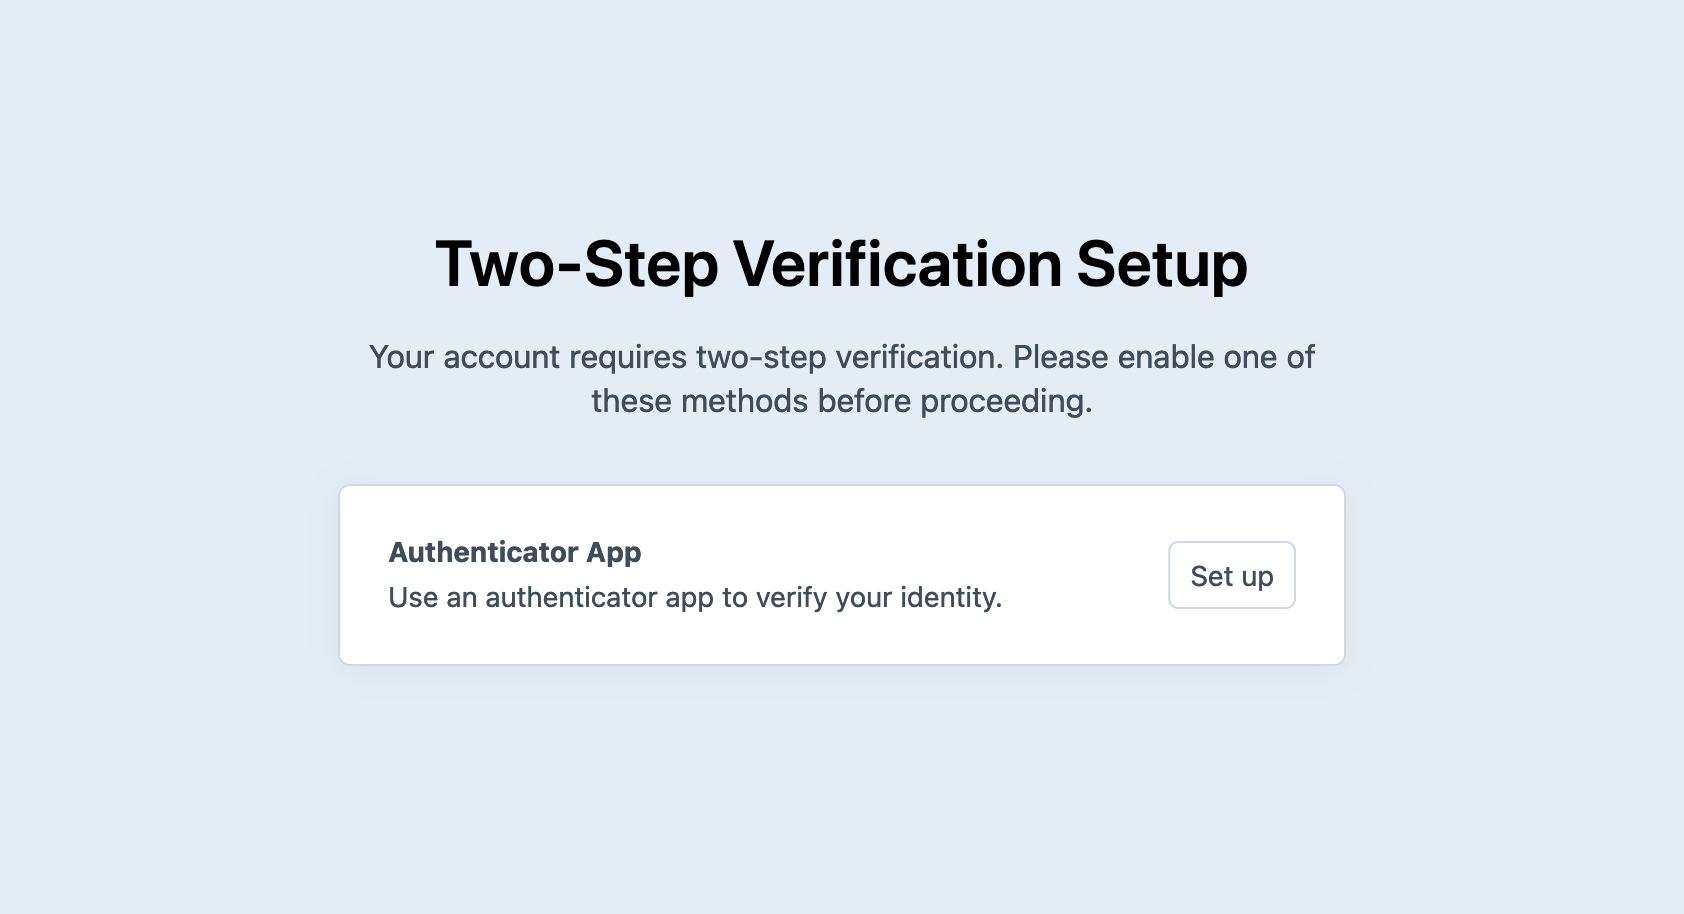
#Front-end Multi-factor Authentication 5.6.0+
When Require two-step verification is enabled for user groups that don’t have control panel access, those users may be sent to the Craft-provided front-end login page to perform additional authentication.
#Public Registration Pro
Public user registration is disabled by default, but can be turned on by visiting
- Settings
- Users
- Settings
Once you set up your site to allow public user registration, the last step is to create a front-end user registration form (opens new window). For a full list of params a user can set during registration (or when updating their account, later on), read about the users/save-user controller action.
By default, Craft puts new users in a pending state and allows them to activate their own accounts via email. You can instead select Deactivate users by default to place a moderation buffer between public registration and eventual access.
#Affiliated Site 5.6.0+
During registration, Craft captures the current site and stores it as the user’s Affiliated Site. This is primarily used to determine what language and template system emails should be use, when sent from site-agnostic contexts (like the control panel or CLI).
#Default Group
Users created via public registration are automatically added to the group designated by the Default User Group setting.
Select this group’s permissions carefully, ensuring that new users don’t immediately get access to tools that can negatively affect other users’ experience.
#Logging In
Any credentialed user can set a password and log in.
#Control Panel
Users with control panel access should use Craft’s native login form, which is shown when visiting /admin (or the path corresponding to your cpTrigger).
Any time an unauthenticated client tries to access a resource in the control panel, they will be redirected to the login page.
After logging in (and, when configured, completing two-step verification), they will be returned to the dashboard, or whichever protected page they originally attempted to access.
When a control panel user authenticates and is redirected, their permissions may still prevent them from viewing that resource.
#Front-end Pro
Sites that support public registration or whose administrators create accounts without control panel access are apt to require front-end login forms.
The loginPath setting determines where Craft sends users who access pages guarded by the {% requireLogin %} or {% requirePermission %} tags, as well as the value of the global loginUrl variable:
<header>
  <img src="{{ siteUrl('assets/logo.png') }}" alt="{{ siteName }}">

  {% if currentUser %}
    Welcome, {{ currentUser.fullName ?: currentUser.username }}!
    <a href="{{ siteUrl('my-account') }}">My Account</a>
    <a href="{{ logoutUrl }}">Sign out</a>
  {% else %}
    <a href="{{ loginUrl }}">Sign in</a>
  {% endif %}
</header>
By default, this path is login, so {{ loginUrl }} would print something like https://my-project.ddev.site/login.
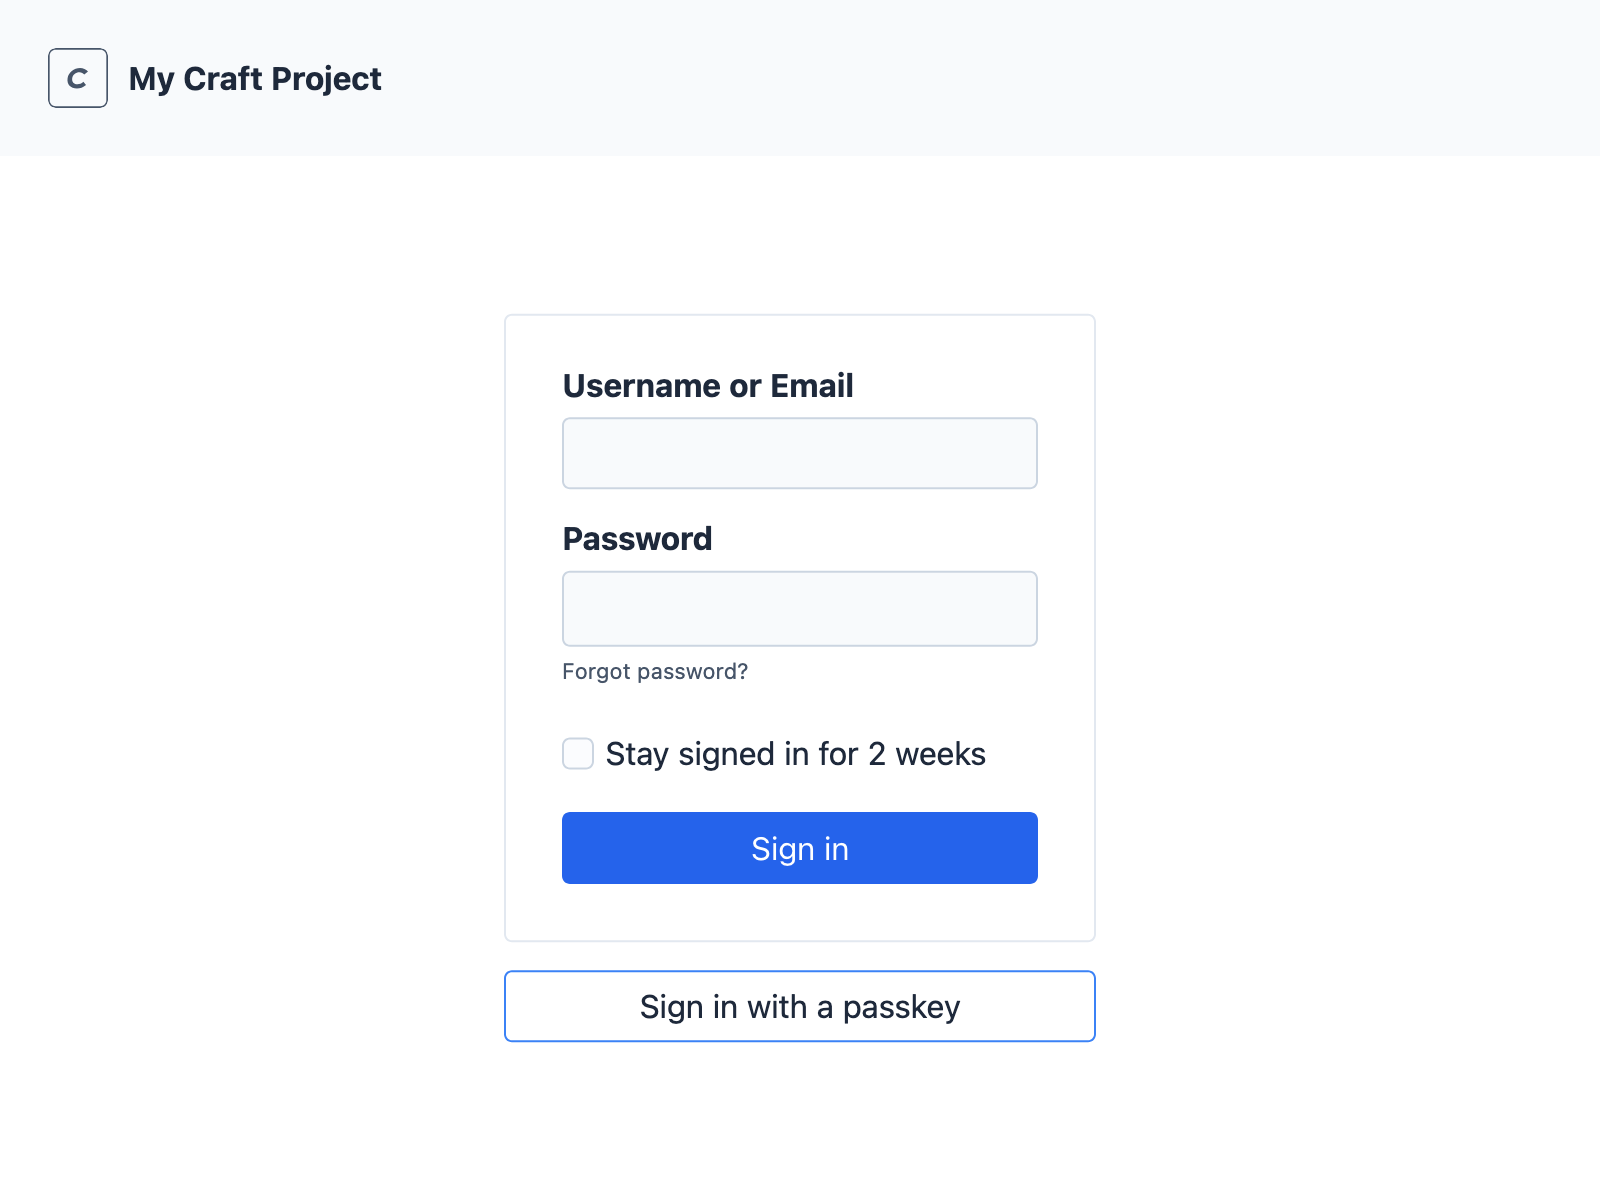
When this route is requested, Craft looks for the corresponding template, templates/login.twig. If it can’t be found, a bare-bones internal version will be used:
5.6.0+
You can inject additional styles into this page using the systemTemplateCss setting:
use craft\config\GeneralConfig;

return GeneralConfig::create()
    // ...
    ->systemTemplateCss('/assets/styles/system.css')
;
Full reference for the CSS variables used on this page are available in the source (opens new window). 5.6.0+
This template will also be displayed when users are required to set up a new two-step verification method (or complete authorization, later).
No template is rendered for requests matching the logoutPath; the user’s session is terminated, and they are redirected to the postLogoutRedirect.
#Custom Template
Create a new Twig file at templates/login.twig (or templates/{loginPath}.twig, if you have a custom loginPath) with the following content:
<form method="post">
  {{ csrfInput() }}
  {{ actionInput('users/login') }}

  <label for="login-name">Username/Email</label>
  <input type="text" name="loginName" id="login-name">

  <label for="password">Password</label>
  <input type="password" name="password" id="password">

  <button>Sign in</button>
</form>
You are free to have this template extend an existing layout, or directly add <head> and <body> tags.
Visiting your site’s /login page in a private browser, you should see the unstyled form. Opening the same page in a browser with an active session may redirect you to the configured postLoginRedirect (or the primary site’s homepage, by default).
Additional information about handling login and account creation can be found in our Front-End User Accounts (opens new window) guide.
Any valid username and email combination can be submitted to log in. As mentioned above, if the user needs to set up or authenticate with a two-step verification method, they will be taken to the “system” login view to complete their login.
To help users understand the state of their session (and in some limited circumstances, specific issues with the submitted information), you can output flashes from the login action:
{% set flashes = craft.app.session.getAllFlashes(true) %}

{% if flashes is not empty %}
  <ul>
    {% for flash in flashes %}
      <li>{{ flash }}</li>
    {% endfor %}
  </ul>
{% endif %}
#Custom Routes
The loginUrl Twig variable is set based on the corresponding config value. How this route is handled is actually up to your project! When the loginUrl path is requested by a client, Craft uses its normal route resolution process, including the normal element URI search, routes.php rule matching, and looking in your project’s templates/ directory.
This means that you can decouple the route from the template by adding a rule to your routes.php file:
return [
    // Assuming your `general.php` config sets `loginPath` to `account/sign-in`...
    'account/sign-in' => ['template' => '_accounts/login'],
];
Then, you would be free to create templates/_accounts/login.twig, alongside other templates in a hidden directory.
#Additional Tools
These variables are available in all Twig contexts:
loginUrl— Defined by loginPath. Used to build a link to the central login page, and where users will be redirected when requesting a protected resource.logoutUrl— Defined by logoutPath. Used to build a link that immediately logs the user out.setPasswordUrl— Defined by setPasswordRequestPath. Used to build a link to a central page where users can request their password be reset. A link is sent to the user’s email address (based on the setPasswordPath setting) withidandcodequery parameters.
Other URLs are generated when activating accounts or resetting passwords, and are not available for direct use in templates.
Fine-grained control over registration and sign-in workflows are possible with these settings:
- Logging in and out…
- loginPath — Determines the
loginUrlvariable. (Default:login) - logoutPath — Determines the
logoutUrlvariable, and maps the specified path to theusers/logoutcontroller action. (Default:logout)
- loginPath — Determines the
- Account activation…
- setPasswordRequestPath — Determines the
setPasswordPathvariable. (Default:setpassword) Users will visit this page to request a password reset link. - setPasswordPath — Where users will be sent to set a password. These secure, temporary URLs are generated by Craft when sending a password reset email, or when another user with the Administrate users permission requests a password reset link via the control panel.
- setPasswordSuccessPath — Where users are redirected after successfully setting a new password.
- setPasswordRequestPath — Determines the
- Changing and verifying email addresses…
- verifyEmailPath — Used when generating a link sent via email to verify access to an email address.
- verifyEmailSuccessPath — Similar to
setPasswordSuccessPath, but for redirection after a user verifies their email address (either upon creating an account, or changing its email address). - useEmailAsUsername — Simplifies record-keeping and authentication by eliminating discrete usernames.
- Security and timing…
- autoLoginAfterAccountActivation — Control whether users are immediately logged in after completing registration (typically when a pending user clicking an email confirmation link or setting a password). (Default:
false) - purgePendingUsersDuration — How long Craft waits before deleting pending, non-activated users. (Default:
0, or disabled) - purgeStaleUserSessionDuration — How long Craft waits before dropping stale sessions from the
sessionsdatabase table. This may (Default: 90 days) - invalidUserTokenPath — Where users are redirected if the token or code in an activation or verification link is invalid or has expired.
- autoLoginAfterAccountActivation — Control whether users are immediately logged in after completing registration (typically when a pending user clicking an email confirmation link or setting a password). (Default:
#CLI
Craft’s command line provides admin-level user management tools. With access to the underlying server, you can create, delete, and impersonate users, get activation URLs, set passwords, and even log out all users.